Can You Use Super Glue On Led Strip Lights?
Yes, you can use super glue on led strip lights. In fact, it is one of the best ways to attach them to surfaces. The key is to use a very small amount and be careful not to get any on the exposed part of the light.
- Cut the LED strip light to the desired length using a sharp knife or scissors
- Remove the adhesive backing from the LED strip light
- Apply a small amount of super glue to the end of the LED strip light
- Join the two pieces of LED strip light together and hold for 30 seconds until set
Light Strips Falling Down? Best Solution
What Glue Can I Use on Led Strip Lights?
You can use a variety of glues on LED strip lights, but it is important to choose one that will not damage the light or cause it to malfunction. Many adhesives are too thick and will prevent the light from dispersing evenly, so it is important to find a glue that is thin enough to allow for proper light distribution. In addition, some glues can emit harmful chemicals that can damage the LED chips over time.
To avoid this, look for a glue that is labeled as safe for use with electronics.
How Do You Glue down Led Lights?
Whether you’re trying to add a little extra light to your workbench or want to spice up the look of your home theater, adding LED lights is a great way to do it. But how do you go about gluing them down?
The first step is to figure out where you want to place your LEDs.
Once you have an idea of where they’ll go, use a tape measure to get the dimensions of the area. This will help you determine how much wire you need and how many LEDs you can fit in the space.
Next, cut your strip of LEDs to size using wire cutters.
If your strip has adhesive backing, peel off the paper backing and stick the strip down in your desired location. If not, use a strong adhesive like epoxy or hot glue to attach the strip. Be sure not to put too much glue; just enough to hold it in place while the epoxy sets.
Now that your LEDs are glued down, it’s time to connect them up! Most strips come with positive and negative leads at either end; simply connect these leads to their respective power supply terminals. If everything is hooked up correctly, your LEDs should now be lit up and ready for use!
How Do You Keep Led Strips from Falling Off?
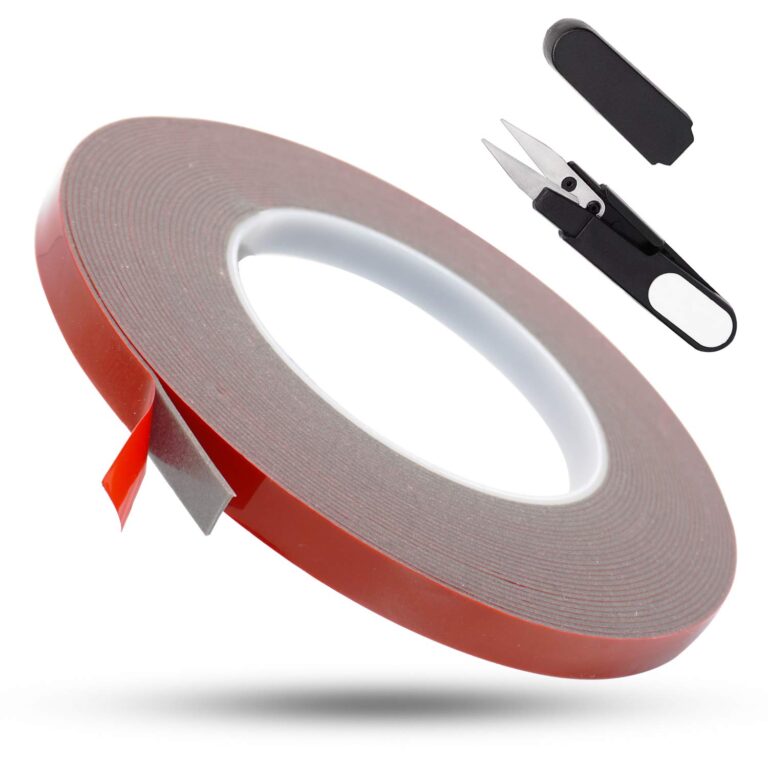
One of the most popular questions we get here at LEDSupply is how to keep LED strips and modules from falling off. While there are a few different ways to do this, using double-sided tape is usually the easiest method.
For smaller applications, 3M Scotch Mounting Tape can be used.
This tape has an acrylic adhesive on both sides and works great for mounting LEDs in tight spaces or where a permanent bond is not needed. For larger projects or where a more permanent bond is necessary, we recommend using 3M 9080LE Adhesive Transfer Tape. This tape has an extremely aggressive acrylic adhesive that will hold up over time and in harsher environments.
When applying either of these tapes, it is important to make sure that the surface is clean and free of any debris. We also recommend testing the adhesion on a small section before applying to the entire project.

Credit: www.lepro.ca
Best Glue for Led Strip Lights
If you’re looking for the best glue for LED strip lights, look no further than Gorilla Glue. This all-purpose adhesive is perfect for bonding LED strips to a variety of surfaces, including plastic, metal, glass, and more. Gorilla Glue provides a strong hold that can withstand both high and low temperatures, making it ideal for use in a wide range of environments.
Plus, it’s easy to apply and dries clear, so your LED strip lights will look great once they’re installed.
How to Keep Led Light Strips from Falling off
If you have ever tried to use LED light strips, you know that one of the most annoying things about them is that they always seem to fall off. It’s even more frustrating when you’re trying to use them in a tight space and they just won’t stay put. Here are a few tips on how to keep your LED light strips from falling off:
1. Use double-sided tape: This is probably the easiest and most effective way to keep your LED light strips in place. Just apply a strip of double-sided tape to the back of the LED strip and then press it firmly into place.
2. Use magnets: If you’re using LED light strips in a metal surface, you can actually use magnets to keep them in place.
Just attach small magnets to the back of the LED strip and then stick it onto the metal surface. The magnets will hold it securely in place.
3. Use Velcro: Another option for keeping your LED light strips in place is to use Velcro.
Just apply a strip of Velcro to the back of the LED strip and then press it firmly into place on your desired surface.
4. Use adhesive hooks: For an even stronger hold, you can try using adhesive hooks.
Glue for Led Lights
If you’re looking for a way to add some extra flair to your LED light display, then you might want to consider using glue. Glue can be used to create interesting patterns and designs on your lights, and it’s also a great way to attach LEDs to other surfaces.
There are a few things to keep in mind when using glue with LEDs.
First, make sure that the glue is non-toxic and safe for use with electronics. Second, be careful not to get any glue on the actual LED bulbs themselves, as this could cause them to malfunction. Finally, test out your design on a small section of lights before applying it to the entire display.
With a little bit of creativity, you can use glue to take your LED light display to the next level!
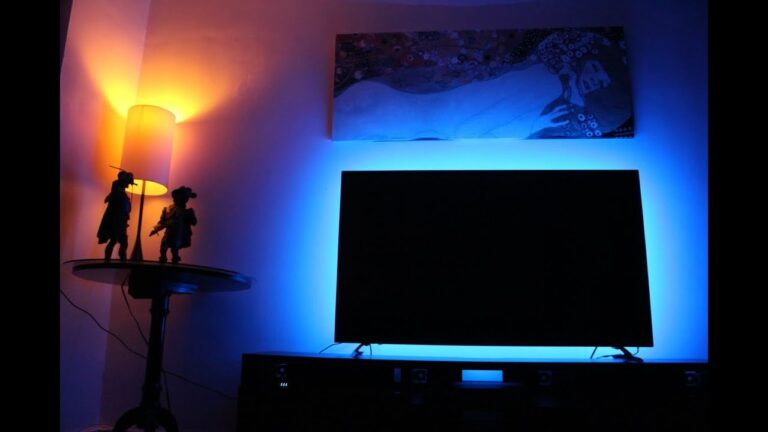
How to Stick Led Strip Lights on Tv
If you want to add a little bit of extra flair to your TV, you can do so by adding some LED strip lights. This is a relatively simple process and only requires a few supplies. Here’s what you need to know about how to stick LED strip lights on TV.
The first thing you’ll need is a set of LED strip lights. You can find these online or at most hardware stores. Make sure you get a set that’s specifically designed for TVs.
Next, you’ll need some double-sided tape. This will help keep the lights in place on the back of your TV.
Now it’s time to apply the double-sided tape to the back of your TV.
Start by peeling off one side of the tape and then attaching the LED strip light to it. Press down firmly to make sure it’s secure. Repeat this process until all of the lights are in place on the back of your TV.
Finally, plug in the LED strip light and enjoy your new TV look!
How to Stick Led Strip Lights on Wall Without Damaging Paint
If you’re looking for a simple, elegant way to add accent lighting to your home without damaging your walls, look no further than LED strip lights. LED strip lights are thin, flexible strips of LEDs that can be stuck to almost any surface. They come in a variety of colors and can be controlled with a remote, making them perfect for setting the mood in any room.
Plus, they’re super easy to install – all you need is some clear tape or adhesive strips. Here’s how to do it:
1. Start by cleaning the wall where you’ll be applying the LED strip lights.
This will help ensure that the adhesive sticks properly.
2. Once the wall is clean, measure out how much LED strip light you’ll need and cut it to size with scissors (be careful not to damage the LEDs).
3. Apply the included adhesive backing or clear tape to the back of the LED strip light.
Be sure to line up the end of the strip with the beginning so that there’s no gap in between (this could cause issues with water damage).
4. Gently peel off the backing paper or tape and apply pressure to adhere the LED strip light firmly onto your chosen spot on the wall (a level surface is best). You may want to use a few pieces of painter’s tape or other removable adhesiveTactics o hold everything in place while you work.
Note: make sure not To press too hard when applying pressure – this could cause damage To The paintwork beneath! 5 Allow The adhesiveTo cure For at least 24 hours before powering on The LEDs 6 Finally, connect your power supply And controller (if using) following The instructions provided With your product 7 That’s it!
How to Get Led Lights to Stick in Car
If you’re looking to add some extra style to your car, LED lights are a great way to do it. But if you’ve ever tried to put them in, you know that they can be a bit tricky to get to stay put. Here are a few tips on how to get your LED lights to stick in your car:
1. Use double-sided tape. This is probably the easiest and most effective way to get your LEDs to stay put. Just apply a strip of double-sided tape to the back of the light and then press it into place.
2. Use hot glue. If you don’t have any double-sided tape on hand, hot glue can also work well. Just apply a small amount of glue around the edge of the light and then press it into place.
3. Use velcro strips. Another option is to use velcro strips. Simply attach one side of the velcro strip to the back of the LED light and then attach the other side of the strip somewhere on your car’s interior (like underneath the dash).
This will hold the light in place while still allowing you to remove it easily when needed.
4. Use magnets.
How to Attach Led Strip Lights
If you want to add some extra light and style to your home, then you should definitely consider attaching led strip lights. Led strip lights are a great way to brighten up any space, and they can be used in a variety of different ways. Here are some tips on how to attach led strip lights:
1. Choose the right location: First of all, you need to choose the right location for your led strip lights. You should pick a spot where the strips will not be visible during the daytime, so that they can really stand out at night. Also, make sure that the surface is clean and smooth so that the adhesive tape will adhere properly.
2. Apply adhesive tape: Once you have chosen the perfect location for your led strip lights, it’s time to apply some adhesive tape. This will help keep the strips in place and prevent them from falling off. Make sure to follow the manufacturer’s instructions carefully when applying the adhesive tape.
3. Connect the power supply: The next step is to connect the power supply to your led strip lights. Most strips come with a 12-volt DC adapter, but you may need a different voltage depending on what kind of transformer you’re using (if any). Again, make sure to check the manufacturer’s instructions before connecting anything.
4. Mounting clips (optional): If you want extra security for your led strip lights, then you can use mounting clips which attach directly onto surfaces like walls or cabinets. This way, even if the adhesive tape comes loose, your strips will still stay in place.
5. Enjoy your new lighting: That’s it!
Once everything is set up correctly, simply turn on your power supply and enjoy your new lighting setup!
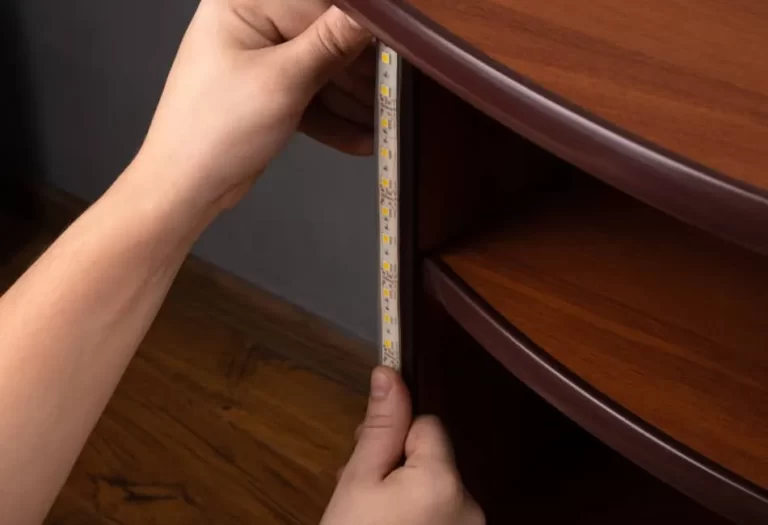
How to Stick Led Strip Lights to Wood
In this post, we’ll go over how to stick LED strip lights to wood in eight easy steps. By the end of this post, you’ll know everything you need to about how to make your own custom light-up sign or piece of art using LED strips and wood.
1. Start by measuring the area where you want to place your LEDs.
This will help you determine how many strips you’ll need and what size they should be.
2. Cut your LED strips to size using a sharp knife or scissors. Make sure the cuts are clean and straight so that the LEDs will fit snugly against the wood surface.
3. Apply a thin layer of adhesive promoter to the back of each LED strip. This will help the strip adhere better to the wood surface.
4. Place your LED strips on the wood surface, taking care to line them up evenly with each other.
Use a leveler tool if necessary to ensure that they’re perfectly straight.
5 Press each strip down firmly for 30 seconds or longer to set the adhesive promoter properly . Wait at least one hour for it to dry completely before proceeding .
(You can speed up this process by using a hair dryer on its warm setting.)
6 Apply another thin layer of adhesive promoter over top of each LED strip . This time, also apply it around 3/4″ from each edge of thestrip .
7 Center an acrylic sheet over top ofthe entire project , making sure that it’s flush with all four sides . Use painter’s tape along all four edgesto secure it in place while you work . 8 Finally , connect your power sourceto one endofthe firstLED string , then plug it into an outlet or extension cordand flip th e switch!
Conclusion
Super Glue is an extremely strong and fast-drying adhesive. It can be used on a variety of surfaces, including plastics, metals, glass, and ceramics. While Super Glue is typically used for household repairs, it can also be used for LED strip lights.
LED strip lights are becoming increasingly popular as they are energy-efficient and provide a clean, modern look. However, they can be difficult to install as the strips are often too long and need to be cut to size. This can result in loose connections which can cause the lights to flicker or fail entirely.
Super Glue can be used to secure the connections between LED strip lights and their power source. This will ensure a tight connection and prevent any flickering or failures. Simply apply a small amount of Super Glue to the exposed copper wires and allow it to dry completely before powering on the lights.