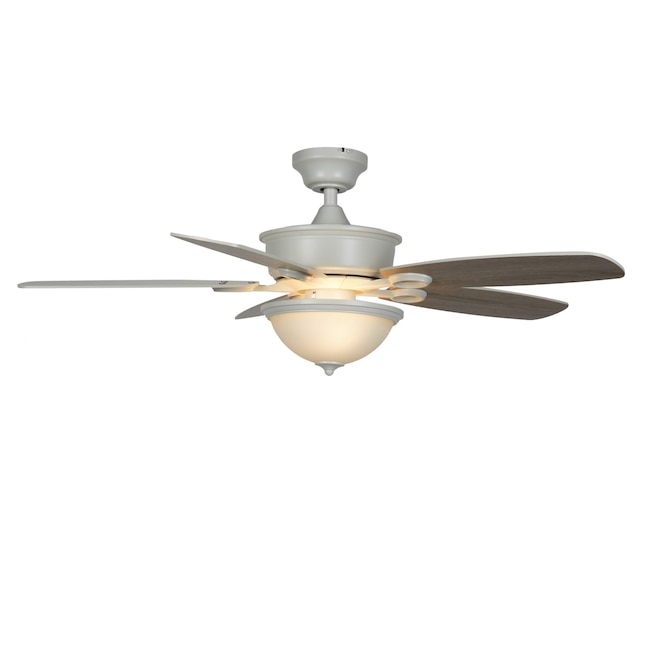
How to Convert a Downrod Ceiling Fan to a Flush Mount
A flush mount ceiling fan is one that mounts directly to the ceiling, without any hanging rods. To convert a downrod ceiling fan to a flush mount, you will need to remove the downrod and install the flush mount bracket that came with the fan. Once the bracket is in place, you can then attach the ceiling fan directly to it.
- If your ceiling fan has a downrod, you’ll need to remove it before converting the fan to a flush mount
- To do this, first remove the blades and set them aside
- Then, unscrew the decorative collar at the top of the downrod and pull the downrod out of the motor housing
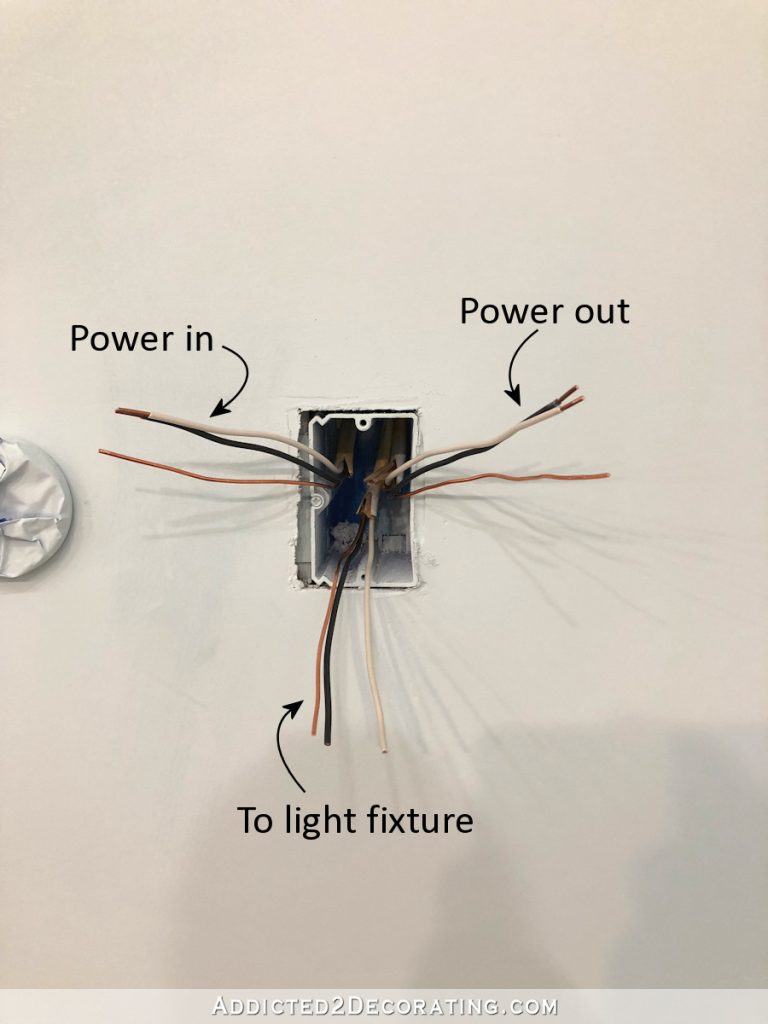
- With the downrod removed, you should be able to see two or three screws holding the motor housing in place on the ceiling mounting bracket
- Unscrew these screws and carefully lower the motor housing until you can access the wires inside
- Cut off any excess wire so that only about 6 inches of wire is protruding from the motor housing
- Then, twist each wire around a corresponding screw inside 4the housing (usually labeled “black,” “white,” and “green” for ground)
- Finally, replace the cover on 4the motor housing and screw it back into place on the ceiling mounting bracket
- At this point, you should be able to reattach your ceiling fan blades and enjoy your newly converted flush mount ceiling fan!
How to make a down rod fan into a flush mount fan
Ceiling Fan Flush Mount Conversion Kit
If you’re looking for a way to convert your ceiling fan from a standard mount to a flush mount, then you’ll need a ceiling fan flush mount conversion kit. This type of kit typically includes all of the necessary hardware and instructions for completing the conversion.
There are several reasons why you might want to convert your ceiling fan to a flush mount.
For one, it can give your room a more polished and finished look. Flush mounted fans also tend to be less obtrusive and take up less space than standard mounted fans. And, in some cases, converting to a flush mount may actually improve the performance of your ceiling fan by reducing wobble and increasing air circulation.
Before purchasing a flush mount conversion kit, make sure that it is compatible with your particular model of ceiling fan. Once you have the right kit, follow the included instructions carefully to ensure proper installation. With just a little bit of effort, you can enjoy the benefits of having a flush mounted ceiling fan in no time!
Can You Flush Mount a Ceiling Fan With a Downrod
If you’re looking to install a ceiling fan in your home, you may be wondering if you can flush mount it with a downrod. The answer is yes! You can absolutely flush mount a ceiling fan with a downrod.
Here’s what you need to know about doing so:
First, let’s talk about what flush mounting and downroding are. Flush mounting is when the fan is installed directly onto the ceiling, without any type of hanging rod or extension.
Downroding is when the fan hangs from a long rod that extends down from the ceiling (this is also sometimes called a drop rod). So, when we say that you can flush mount a ceiling fan with a downrod, we mean that you can install the fan using a downrod, but have the rod flush against the ceiling rather than hanging down.
Now that we’ve cleared that up, let’s talk about how to actually do it.
If you want to flush mount your ceiling fan with a downrod, you’ll need to purchase an adapter kit specifically designed for this purpose. Once you have your adapter kit, follow these steps:
1. Turn off power to the area where you’ll be working.
This is always important whenever you’re doing any type of electrical work!
2. Remove your existing light fixture (if there is one) and dispose of it properly. Be careful not to damage any wiring – we recommend calling an electrician if you’re not comfortable doing this yourself.
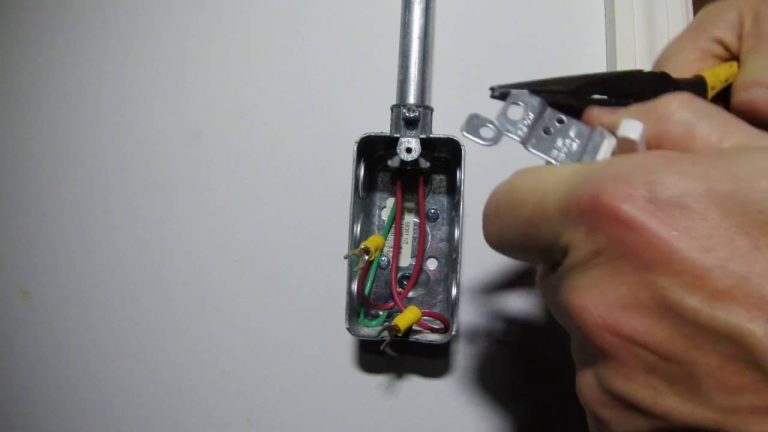
3. Install the bracket that comes with your adapter kit onto the electrical box in the Ceiling opening following all manufacturer instructions carefully . Most brackets will require 4 screws which should be provided in your hardware baggie included with instructions..
Hand tighten only until snug against back of electrical box then stop . Do NOT overtighten and strip out threads as this could cause serious injury later . DO NOT use power tools of any kind on or near electrical boxes . Doing so could result in serious injury or death ! After bracket is secure continue by attaching supplied crossbar piece using two more screws provided again hand tightening only until snug ..4 total screws should now be holding bracket securely in place at this point If unsure seek professional help before continuing!!
Can I Remove the Downrod from My Ceiling Fan
Most ceiling fans come with a downrod, which is a metal rod that connects the fan to the ceiling. The downrod is what allows the fan to hang from the ceiling and rotate. However, some people choose to remove the downrod from their ceiling fan for various reasons.
Removing the downrod can be helpful if you need to clean your fan or if you want to change the look of your room. It is also a good idea to remove the downrod when you are moving your furniture around, as it can be difficult to manoeuvre around a downrod. If you have a low ceiling, removing the downrod can also make your room look taller.
To remove the downrod from your ceiling fan, start by turning off the power to your fan at the circuit breaker. Next, use a ladder to reach up and unscrew the canopy cover from above your fan.
Flush Mount Vs Downrod Ceiling Fan
When it comes to ceiling fans, there are two main types: flush mount and downrod. Both have their own benefits and drawbacks that you should consider before making a purchase. Here is a quick rundown of each type so you can decide which is right for your needs.
Flush Mount Ceiling Fans
As the name suggests, flush mount ceiling fans are designed to be installed directly onto the ceiling without any hanging rods or other fixtures. This makes them ideal for rooms with low ceilings where a downrod fan wouldn’t be able to circulate air properly.
Flush mount fans also tend to be more affordable than their downrod counterparts.
One downside of flush mount fans is that they often don’t move as much air as downrod models do. This means they might not be ideal for large rooms or areas where you need powerful circulation.
Another potential issue is that some people find them noisy since they’re mounted directly to the ceiling. If noise is a concern, look for a model with blade paddles that create less turbulence as they spin.
Downrod Ceiling Fans
Downrod ceiling fans are designed to hang down from the ceiling on a long rod or pipe (hence the name). This places them further away from the blades, which gives them more clearance to circulate air effectively in larger rooms. Downrod models also tend to be more powerful than flush mounts, making them better suited for circulating air in large spaces quickly.
Flush Mount Ceiling Fan Bracket
A flush mount ceiling fan bracket is a type of bracket that is used to mount a ceiling fan on the ceiling. The bracket is mounted on the joists of the ceiling and then the fan is attached to the bracket. The advantage of using a flush mount bracket is that it gives the fan more support than if it were just mounted on the drywall.
There are two types of flush mount brackets, ones that have wings and ones that don’t. The ones with wings are more stable and secure, but they can be difficult to install. The ones without wings are easier to install but they aren’t as secure.
When installing a flush mount ceiling fan bracket, it’s important to make sure that the bracket is level before attaching the fan. If it’s not level, the fan will wobble and could eventually come loose from the ceiling.
3 Inch Downrod for Ceiling Fan
For many people, a ceiling fan is an essential part of their daily lives. These mechanical wonders keep us cool in the summer and circulate warm air in the winter. But over time, even the best ceiling fans can start to show their age.
One common issue is that the downrod, which connects the fan blades to the motor housing, can become loose or damaged. If your ceiling fan is in need of a new downrod, you’ll be glad to know that they are relatively easy to find and install.
Downrods come in a variety of lengths, so it’s important to measure your old one (or the space between your fan and ceiling) before purchasing a replacement.
3 inch downrods are among the most common size for residential ceiling fans, but if you’re unsure, it’s always best to err on the side of caution and go with a longer length. Installing a new downrod is a fairly simple process that anyone with basic handyman skills can accomplish.
Start by turning off power to your ceiling fan at the breaker box.
Once the power is off, remove the old downrod by unscrewing it from both ends (the top end will likely be hidden by a decorative cap). Next, take your new downrod and screw it into place at both ends. Be sure to hand-tighten only – overtightening could damage your fan motor.
Finally, turn power back on at the breaker box and test out your newly installed downrod!
Harbor Breeze Flush Mount Ceiling Fan Installation
Installing a ceiling fan is a great way to improve airflow in your home and keep things cool during the warmer months. If you’re looking for an easy-to-install option, consider a flush mount ceiling fan. These fans attach directly to the ceiling without any hanging hardware, making them ideal for low ceilings or rooms with limited space.
Before you begin, make sure you have all the necessary tools and materials on hand. You’ll need a screwdriver, pliers, wire cutters, and electrical tape. You should also have a copy of the manufacturer’s instructions handy so you can reference it during the installation process.
Once you have everything you need, follow these steps to install your new flush mount ceiling fan:
1. Turn off power to the area where you’ll be working. This is an important safety precaution that should never be ignored when working with electricity.
2. Remove the existing light fixture (if there is one) from the ceiling using a screwdriver or drill. Be careful not to damage any wires as you remove it.
3. Attach the mounting bracket for your new ceiling fan to the electrical box using screws (included with your purchase).
Make sure it’s secure before moving on.
4. Hang your new ceiling fan from the mounting bracket, again being careful not to damage any wires in the process. If everything looks good so far, go ahead and turn on power to see if your new fan works properly!
How to Install Ceiling Fan Without Hook
For many people, ceiling fans are a must-have in their home. Not only do they provide a refreshing breeze during hot summer days, but they can also help to circulate warm air during the winter months. However, installing a ceiling fan can seem like a daunting task – especially if you don’t have any experience with electrical work.
But don’t worry! With a little patience and some careful instruction, you’ll be able to install your new ceiling fan without any problems.
The first thing you’ll need to do is turn off the power to the area where you’ll be working.
This is critical for safety reasons, so make sure that you double check before proceeding. Once the power is off, remove the old light fixture (if there is one) from the ceiling using a screwdriver. With the old fixture out of the way, it’s time to start installing your new ceiling fan.
First, attach the mounting bracket to the center of the electrical box using screws or bolts (depending on what type of box it is). Next, connect one end of the downrod (the part that hangs down from the motor housing) to the top of the mounting bracket. Depending on how low your ceilings are, you may need a longer or shorter downrod – just make sure that it’s long enough so that there’s at least 7 feet between the blades and the floor when installed.
Now it’s time to connect your wires. Make sure that all wire connections are tight and secure – loose wires could cause serious problems later on. Once everything is connected properly, replace any insulation aroundthe electrical box and then screw in your lightbulb(s).
Credit: www.lowes.com
Can You Remove a Downrod from a Ceiling Fan?
Most ceiling fans come with a downrod, which is a long metal rod that hangs down from the motor housing and connects to the blades. The purpose of a downrod is to keep the blades at the correct distance from the floor so they can create enough airflow. In some cases, you may need to remove the downrod in order to lower the fan or to install it in a shorter ceiling.
To remove a downrod from a ceiling fan, first make sure that the power is turned off to the fan. Then, unscrew the rod from both the motor housing and blade assembly. You may need a screwdriver or Allen wrench to do this.
Once the downrod is removed, you can either install a new one (if needed) or simply reattach the blades directly to the motor housing.
Can You Mount a Ceiling Fan Without Downrod?
Yes, you can mount a ceiling fan without downrod. There are special brackets that are made for this purpose. The bracket will hold the motor of the fan and allow you to attach it directly to the ceiling.
This type of installation is best for rooms with high ceilings.
Can Any Fan Be Flush Mounted?
When it comes to ceiling fans, there are a few different styles that you can choose from. One of those styles is the flush mount ceiling fan. But what exactly is a flush mount ceiling fan?
And can any fan be flush mounted? Let’s take a closer look.
What Is a Flush Mount Ceiling Fan?
A flush mount ceiling fan is a type of ceiling fan that sits close to the ceiling, with little to no gap between the blades and the ceiling itself. This makes them ideal for rooms with low ceilings, as they won’t take up too much space. Plus, they tend to be more energy-efficient since there’s less air movement around the room.
However, not all fans can be flush mounted. In order for a fan to be able to beflush mounted, it needs to have a special type of mounting bracket known as an “integrated hanging system” or IHS. This type of bracket ensures that the fan will sit close to the ceiling without wobbling or rocking back and forth.
Not all fans come with this type of bracket though, so if you’re looking for a flush mount option make sure to check that first.
Can Any Fan Be Flush Mounted?
As we mentioned before, in order for a fan to be able to beflush mounted it needs an IHS (integrated hanging system) mounting bracket.
Not all fans come with this type of bracket though, so if you’re looking for a flush mount option make sure to check that first.
Can I Use a Downrod on a Flush Mount Ceiling Fan?
Yes, you can use a downrod on a flush mount ceiling fan. The downrod helps to circulate the air better and keeps the blades from hitting the ceiling.
Conclusion
If you have a downrod ceiling fan that you want to convert to a flush mount, there are a few things you need to do. First, you need to remove the downrod and canopy from the fan. Next, you need to attach the flush mount adapter to the motor housing.
Finally, you need to install the new blades and light kit (if applicable).