How to Install Surface Mount Light Switch
How to Install Surface Mount Light Switch
1. Locate the desired spot for the switch and mark it with a pencil. Be sure to allow enough space around the marked area for the switch plate.
2. Cut out the drywall around the marked area using a drywall saw or utility knife.
3. Place the electrical box inside the hole and secure it to the framing with screws. The box should be flush with the wall surface.
4. Run Romex cable from the power source to the switch location, leaving about 6 inches of slack at each end of the run.
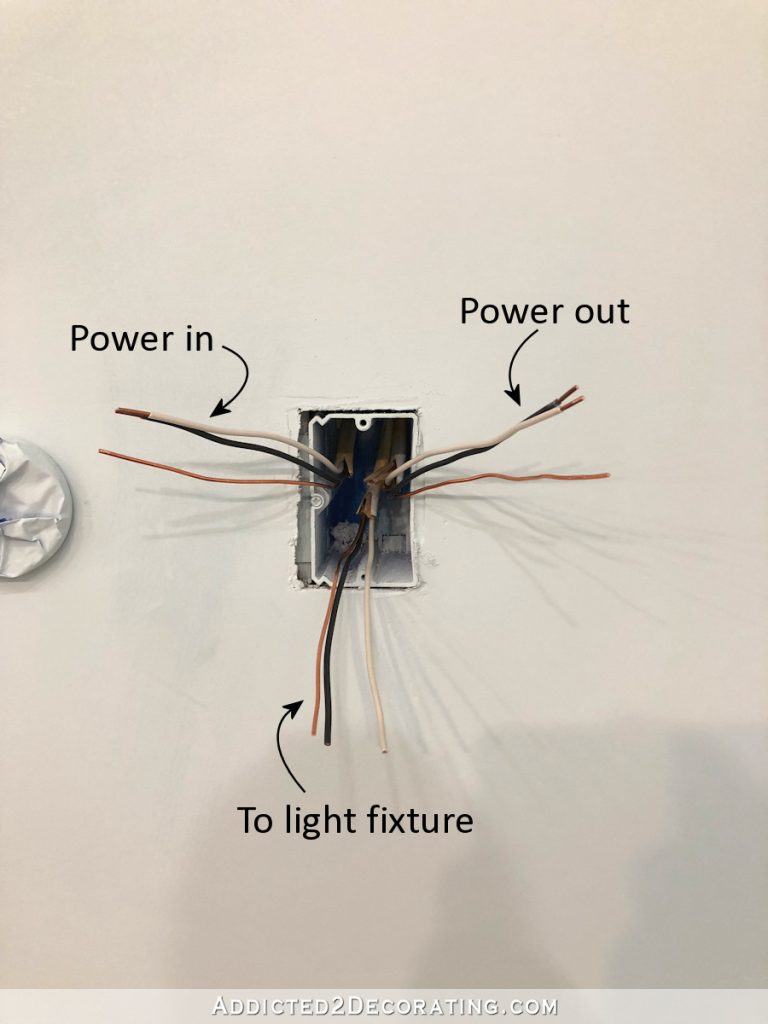
5a. If you are running Romex through metal conduit, strip 10 inches of insulation off of each end of the Romex before proceeding to step 5b below (if not, skip to step 5c). 5b) Using a special clamp-type connector (called a “grounding pigtail”), join together all three bare copper wires inside your junction box: one from your incoming power line, one from your outgoing line to your light fixture(s), and one extra grounding wire (often supplied with your electrical box).
Then twist on a wire nut over all three connections until snug (hand tight plus 1/8 turn). 5c) If you are *not* running Romex through metal conduit: Join together all three bare copper wires inside your junction box as described in step 5b above; then twist on a wire nut over all three connections until snug (hand tight plus 1/8 turn); then place either an approved green ground screw or green plastic cap onto that connection point (the green is for identification purposes only).
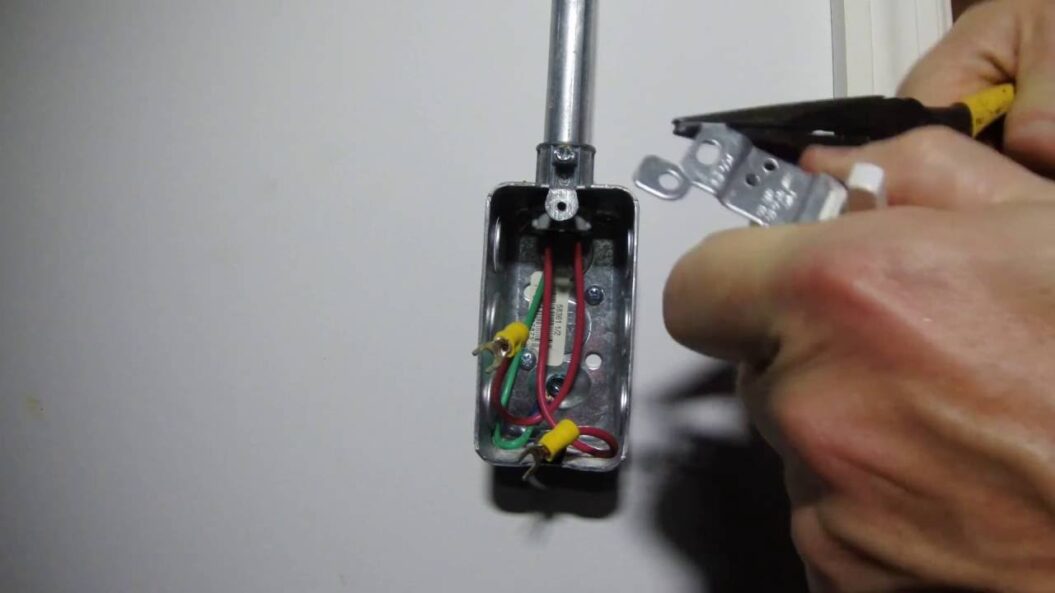
6) Attach each black hot wire coming into and going out of your switch box to one of its two brass terminals; do not connect both blacks to either terminal, but rather attach one black wire per terminal by itself.
Then attach each white neutral wire in similar fashion to its own separate brass terminal; again, don’t connect both neutrals to either terminal but rather keep them separated so that each connects independently.. Finally, if you have a green grounding pigtail mentioned in step 5b above, also screw that down securely onto its own grounding terminal (or if using a green ground screw or cap as per step 5c above, simply tighten that down now too).
- Begin by turning off the power to the circuit that you will be working on at the main electrical panel
- Next, remove the faceplate from the old switch using a screwdriver
- Be careful not to touch any of the wires inside as they may still be live
- Unscrew and remove the switch from the electrical box
- Again, be careful not to touch any of the wires as they may still be live
- Take your new surface mount light switch and insert it into the electrical box
- Screw it in place using the screws that came with it
- Connect all of the wires to their respective terminals on the new switch following their color coding (typically black to black, white to white, and green or bare copper to green or bare copper)
- Make sure all connections are tight and secure before moving on
- If there are pigtail wires present, twist them together and wrap them around a terminal screw before tightening it down securely (this creates a more secure connection)
- Do not overtighten as this could damage or break the terminal screw entirely causing potential wiring problems later on down the road
- Once all connections have been made, tuck any excess wire back into the electrical box so that everything is neat and tidy before replacing the faceplate onto The final step is to turn The power back on at The main breaker panel and test The new switch out by flipping It On And Off several times
How To Install Flush Mount Fixture to Junction Box
How to Install Light Switch With 2 Wires
Installing a light switch with 2 wires is not as difficult as it may seem. In fact, it is quite easy and only takes a few minutes to do. Here are the steps you need to follow:
1. First, turn off the power to the circuit that you will be working on. This can be done by flipping the switch on your breaker box.
2. Once the power is off, remove the faceplate of your light switch using a screwdriver.
3. Next, take a look at the wires that are connected to your light switch. One wire will be black, and one wire will be white. The black wire is always hot, which means it has power even when the switch is turned off.
The white wire is neutral and does not have any power until the switch is turned on.
4. Now, disconnect both wires from the light switch by loosening the screws that hold them in place.
5. Take your new light switch and connect one of the wires to each terminal on theswitch .
It doesn’t matter which wire goes to which terminal , as long as they are bothconnected . 6 Finally , screwthe faceplate back onto 7 Once everythingis secure , turn th 8 Andthat’s it!
Surface Mount Light Switch Home Depot
If you’re looking for an LED light switch, the Surface Mount Light Switch from Home Depot is a great option. This switch features a built-in LED that illuminates when the switch is turned on, making it easy to find in the dark. The switch also has a tamper-resistant design that helps prevent accidental turn-offs.
How to Install Light Switch With 3 Wires
It’s really not as complicated as it might seem at first. Here’s a step by step guide to installing a light switch with three wires. 1. First, shut off the power to the circuit you’ll be working on.
This is important for safety! 2. Next, remove the faceplate from the old switch (if there is one) and unscrew the switch from the electrical box. 3. Carefully disconnect the wires from the old switch- being careful to note which wire goes where.
If you’re not sure, take a picture before you remove them so you can reference it later. 4. Now it’s time to connect your new switch! Take the black (hot) wire and attach it to one of the brass screws on your new switch.
Then take the white (neutral) wire and attach it to one of the silver screws on your new switch. Finally, take the ground wire and attach it to either of the green screws on your new switch- it doesn’t matter which one since they’re both connected to ground anyway. Just make sure all three wires are securely fastened before moving on.
5 . Now screw your new switch into place and replace any faceplates that were removed earlier .
Again, make sure everything is secure before restoring power to the circuit . 6 . Once power has been restored , test out your new lightswitch !
How to Install Single-Pole Light Switch
Most people can easily install a single-pole light switch by following these simple steps. First, turn off the power to the circuit at the breaker box. Next, remove the plate cover and unscrew the switch from the electrical box.
Then, disconnect the wires from the old switch and connect them to the new switch in the same configuration. Finally, screw in the new switch and replace the plate cover.
How to Install a Double Light Switch
If you’re like most people, you probably don’t think about your light switches very often. But if you have a double light switch in your home, it’s important to know how to install it correctly. A double light switch allows you to control two lights from one switch, and it’s a great way to save space on your wall.
Here’s what you need to know to install a double light switch in your home:
1. Turn off the power to the circuit that you’ll be working on. This is important for safety reasons, so make sure that you do this step before proceeding.
2. Remove the old switch by unscrewing the mounting screws and pulling the switch out of the electrical box.
3. Take a look at the wiring inside the electrical box and identify the live wires (the ones that are hot or have electricity running through them). You’ll need to connect these wires to the new switch.
4. Install the new switch by screwing it into place and connecting the wires according to their colors (matching black with black, white with white, etc.). Once everything is connected properly, turn on the power and test out your new double light switch!
How to Install a 3-Way Light Switch
Most people can easily replace a single light switch in their home. But when it comes to replacing or installing a 3-way light switch, things can get a little tricky. If you’re not comfortable working with electrical wiring, then it’s best to leave this job to a professional electrician.
However, if you’re up for the challenge and are confident in your abilities, then here’s how to install a 3-way light switch:
1) Turn off power to the circuit at the breaker box.
2) Remove the old switch by unscrewing the screws that hold it in place.
Then carefully disconnect the wires from the terminals.
3) Take note of how the wires are connected to the old switch so you can replicate this when connecting them to the new switch.
4) Connect the ground wire (usually green or bare copper) to one of the green grounding screws on the new switch.
5) Connect each of the other wires (one at a time) to their corresponding terminals on the new switch until all wires are connected.
6) Screw in both mounting screws and tighten until snug against wall plate.
7) Restore power at breaker box and test out your new 3-way light switch!
How to Add a Switch to an Existing Light
If you’re like most people, your home is probably filled with light switches. And if you’re like most people, you probably don’t think much about them – they’re just there, doing their job. But what if you want to add a switch to an existing light?
It’s actually not that difficult, and it can be a great way to add some extra convenience to your home. Here’s how to do it:
First, turn off the power to the circuit that contains the light switch.
Then, remove the switch plate and unscrew the switch from the electrical box. Next, connect the black (hot) wire from the new switch to the black (hot) wire of the old switch. Then, connect the white (neutral) wire from the new switch to one of the brass screws on the old switch.
Finally, screw in the new switch and replace the switch plate. That’s it! Now you have an additional light switch for your convenience.
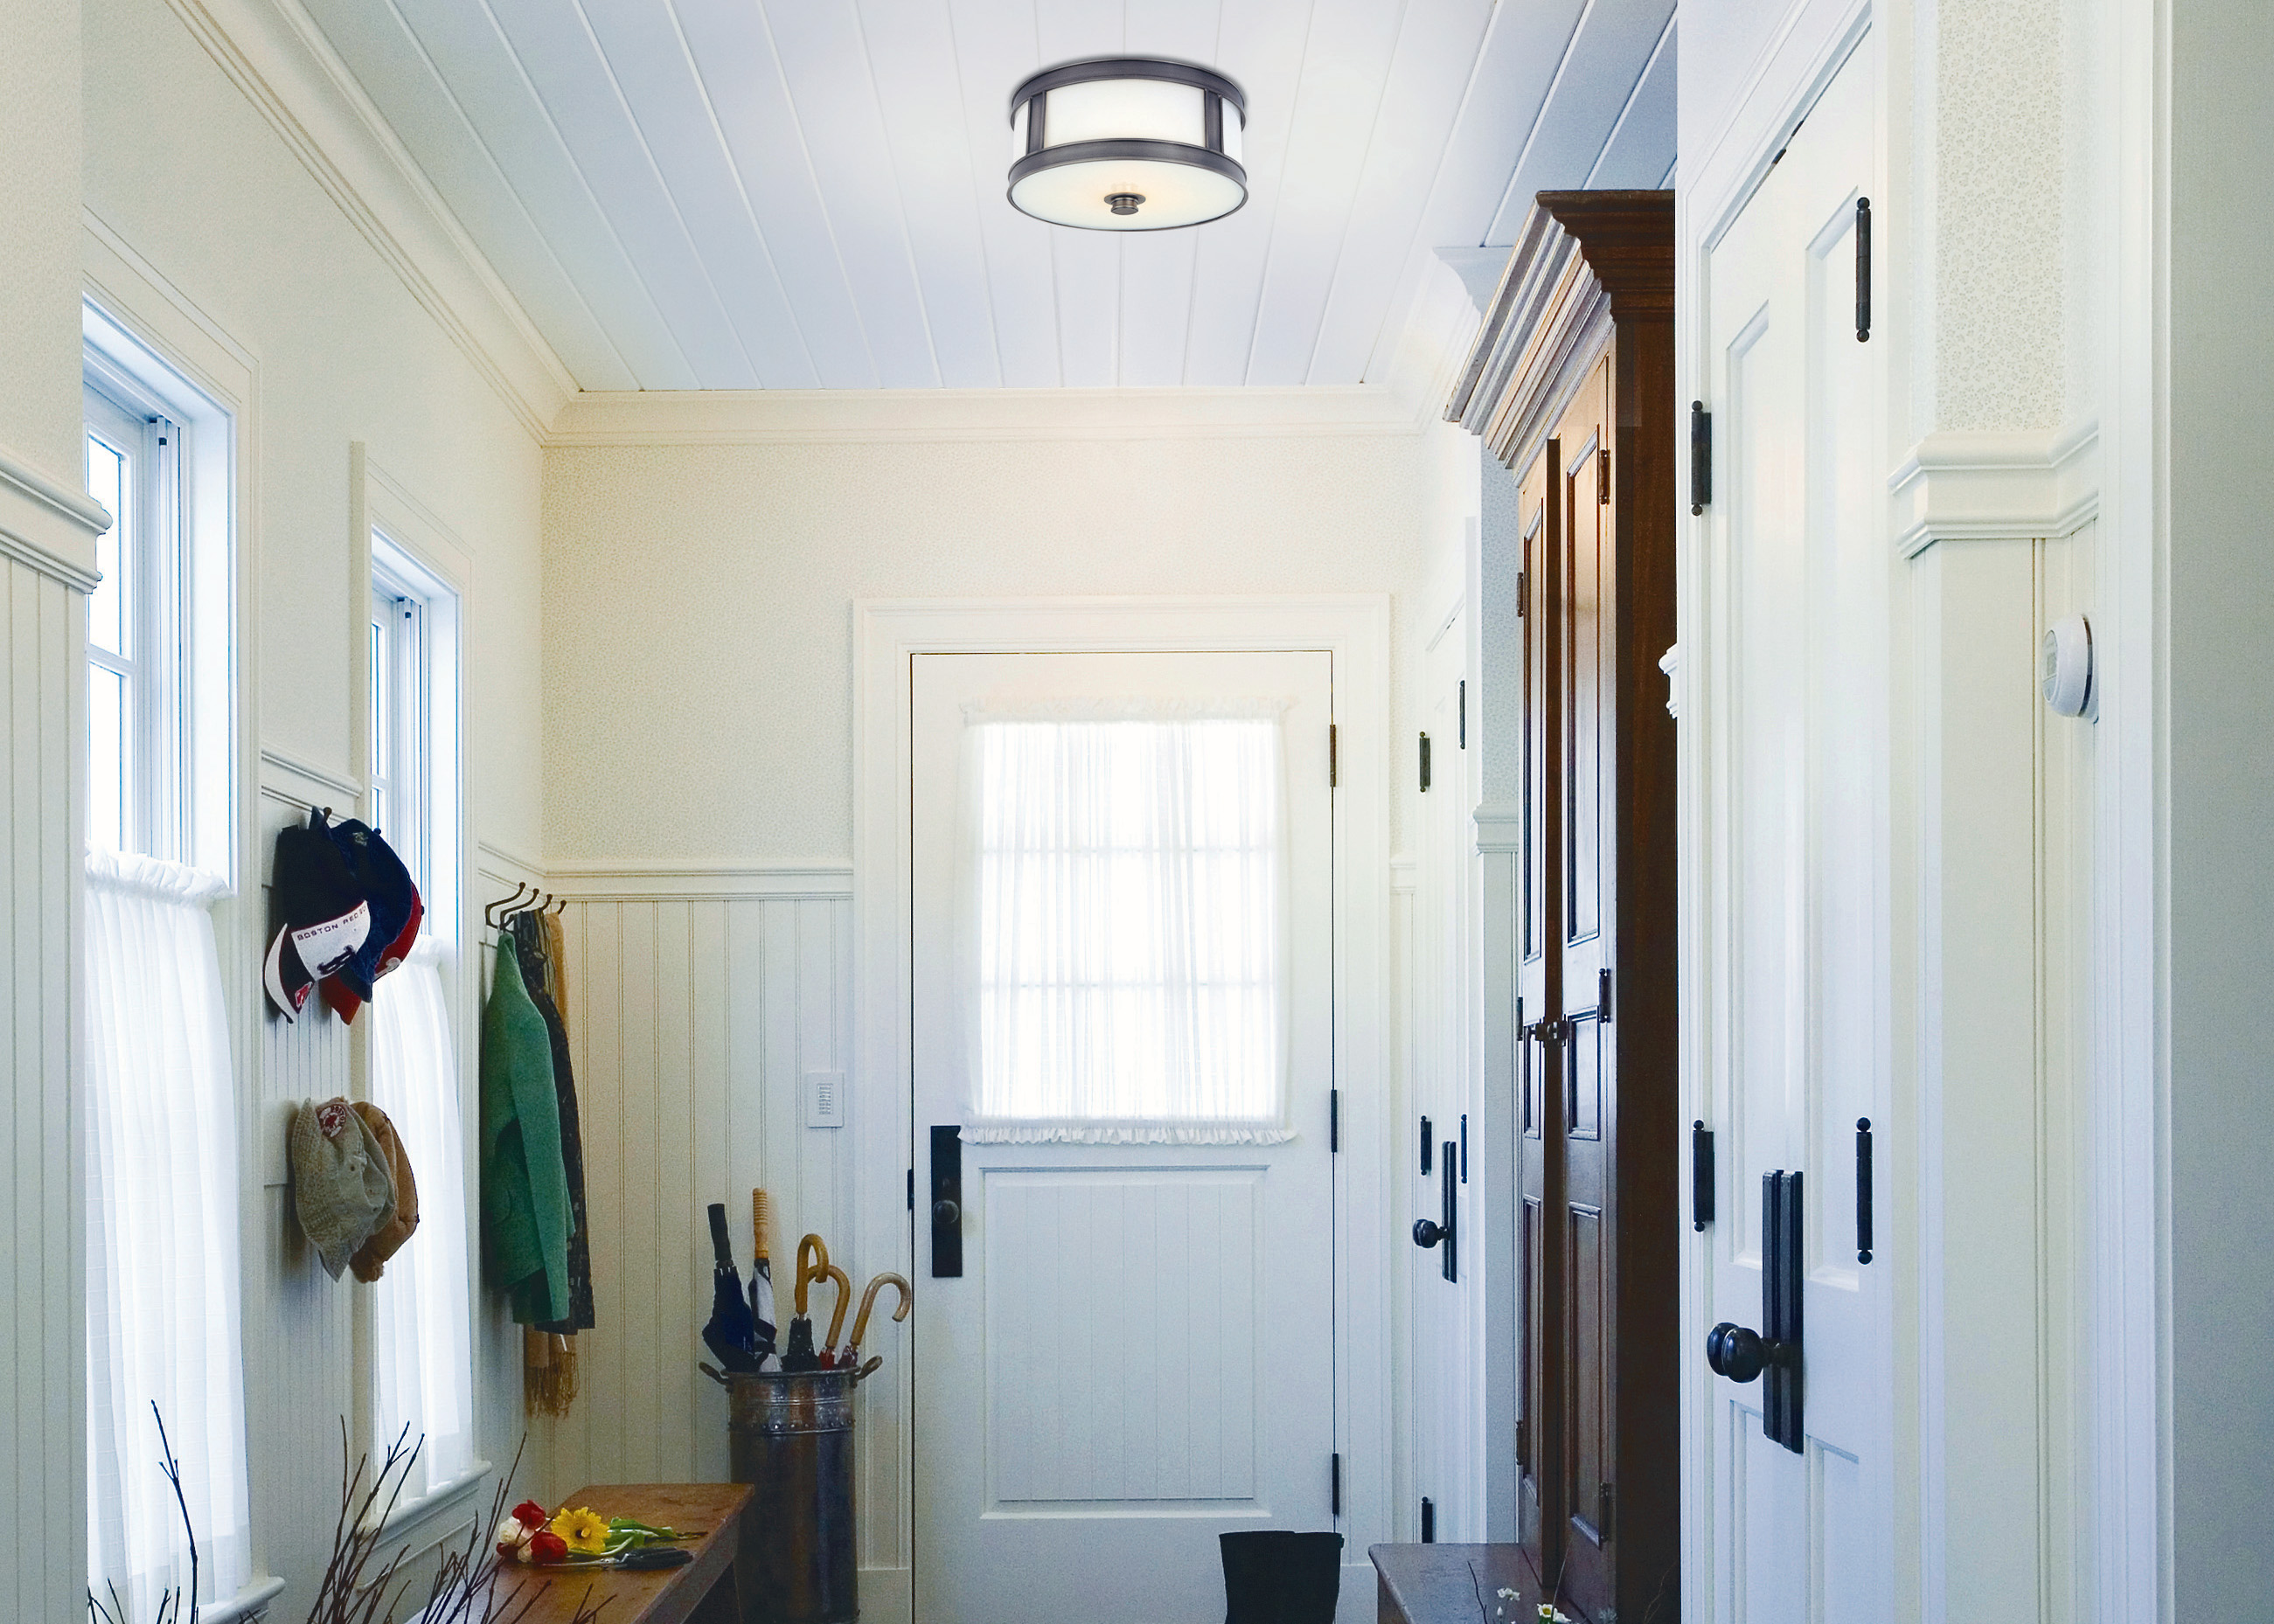
Credit: www.destinationlighting.com
Can You Surface Mount Electrical Wiring?
If you’re considering surface mounting your electrical wiring, there are a few things you should keep in mind. First, surface mounted wiring is not as durable as recessed or embedded wiring, so it’s important to make sure that any exposed wires are properly insulated. Second, because surface mounted wiring is less hidden, it may be more likely to be damaged by pests or other outside forces.
Finally, surface mounted wiring is generally more expensive than other types of wiring, so it’s important to weigh your options before making a decision.
How Do You Install a Surface Mount Electrical Box?
Installing a surface mount electrical box is a pretty simple process. First, you’ll need to gather your materials. You’ll need the electrical box, of course, as well as a screwdriver, wire strippers, and some wire nuts.
Once you have everything gathered, you can begin the installation process.
First, use the screwdriver to remove any existing outlets or switches from the wall. Next, holding the electrical box in place, trace around it with a pencil so you know where to cut.
Be sure to make your cuts straight so the box will fit flush against the wall.
After tracing and cutting out the hole for the box, feed your wires through the knockout holes on the side of the box. Strip about ¾ inch of insulation off of each wire using your wire strippers.
Now it’s time to connect your wires to their proper terminals using wire nuts – be sure not to mix up hot and neutral wires!
Finally, use screws (usually provided with the electrical box) to secure the box to the wall. Once everything is tight and snug, replace any outlet or switch covers and turn on power at your circuit breaker panel – you’re all done!
How Do You Install a Single Pole Toggle Switch?
If you’re in the process of wiring up a new home or office, or even if you’re just replacing an old switch, you’ll need to know how to install a single pole toggle switch. This type of switch is one of the most common and can be used for a variety of applications. Here’s a step-by-step guide to help you get the job done quickly and easily.
1. First, turn off the power to the circuit that you’ll be working on. You can do this by switching off the breaker at your main electrical panel.
2. Once the power is off, remove the old switch by unscrewing it from the electrical box and pulling it out.
If there are any wires still attached to the switch, carefully remove them as well.
3. Take a look at the wiring in your electrical box and identify which wire is hot (carrying live current) and which is neutral (returning current). The hot wire will usually be black or red, while the neutral will be white or green.
4. To install your new toggle switch, start by connecting the hot wire to one of the brass terminals on the side of the switch body.
How Do You Install a Light Switch in the Wall?
Installing a light switch is a pretty simple and straightforward electrical project. However, there are a few things you need to keep in mind before starting. First of all, make sure that the power is turned off to the circuit you’ll be working on.
Secondly, always use caution when working with electricity. With that said, let’s get started.
The first thing you’ll need to do is remove the old light switch from the wall.
To do this, simply unscrew the switch plate from the wall and then unscrew the two screws that hold the actual switch in place. Once theswitch is loose, carefully pull it out of the box (be careful not to damage any wires).
Next, take your new light switch and insert it into the box.
Make sure thatthe wires are properly aligned (typically black to black and white to white). Once everything looks good, screw the switch into place and then screw onthe new switch plate. That’s it!
Just turn on the power and test out your new light switch.
Conclusion
If you’re looking to install a surface mount light switch, there are a few things you’ll need to keep in mind. First, make sure that the power is off to the circuit you’ll be working on. Once you’ve confirmed that, locate the spot where you want to install the switch and mark it accordingly.
Next, using a drill or other appropriate tool, create an hole big enough for the mounting screws. With that done, it’s time to wire up the switch. The black wire will go to the brass screw, while the white wire goes to the silver screw.
Finally, tighten down all of the screws and restore power to the circuit before testing out your new switch!