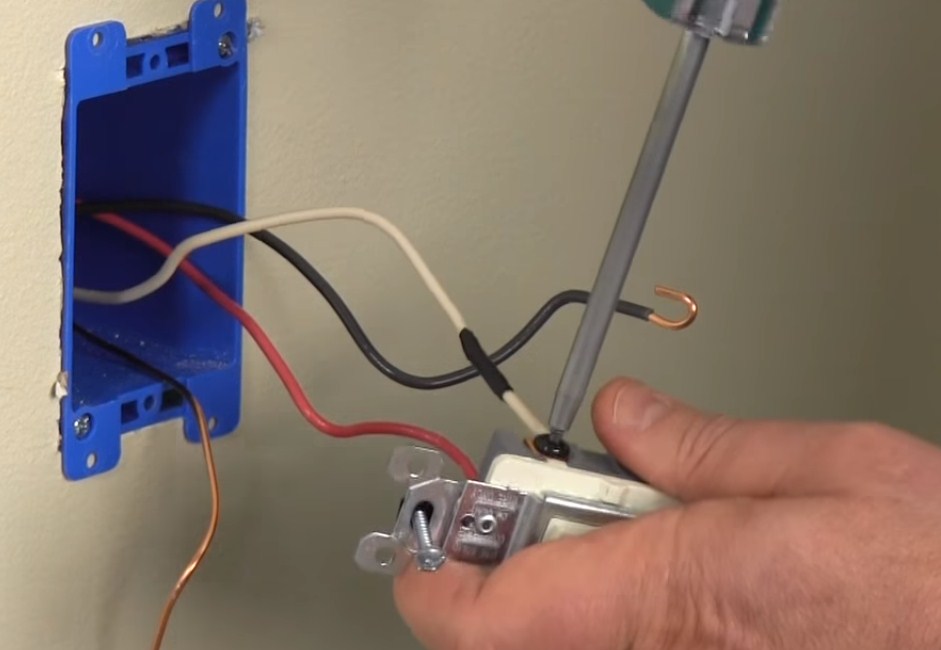
How to Install a Single Pole Light Switch With 3 Wires
Shut off the power to the circuit you will be working on. Remove the switch plate and unscrew the switch from the electrical box. Unscrew the wires from the terminals on the old switch and twist each wire around a pencil to hold it in place while you work.
Install the new switch in the electrical box and screw it in place. Screw on wire caps to secure each of the 3 wires to their respective terminals on the new switch. Turn on power at fuse box/circuit breaker panel and test your new light switch!
- 1) Turn off the power to the circuit at the main breaker or fuse box
- 2) Remove the switch plate cover from the wall using a screwdriver
- 3) Unscrew and remove the switch from the electrical box
- 4) Identify and disconnect the two black wires (the hot wires) from the switch terminals
- 5) Connect one of the black wires to one of the brass screws on the new switch, and tighten with a screwdriver
- 6) Connect the other black wire to the other brass screw, and tighten with a screwdriver
- 7) Identify and connect the green ground wire to green or bare copper grounding screw on new switch, and tighten with a screwdriver
- 8) Screw in new switch into electrical box until it’s snug against wall, then replace switch plate cover
- 9 ) Restore power at main breaker or fuse box, and test your new switch by flipping it on and off
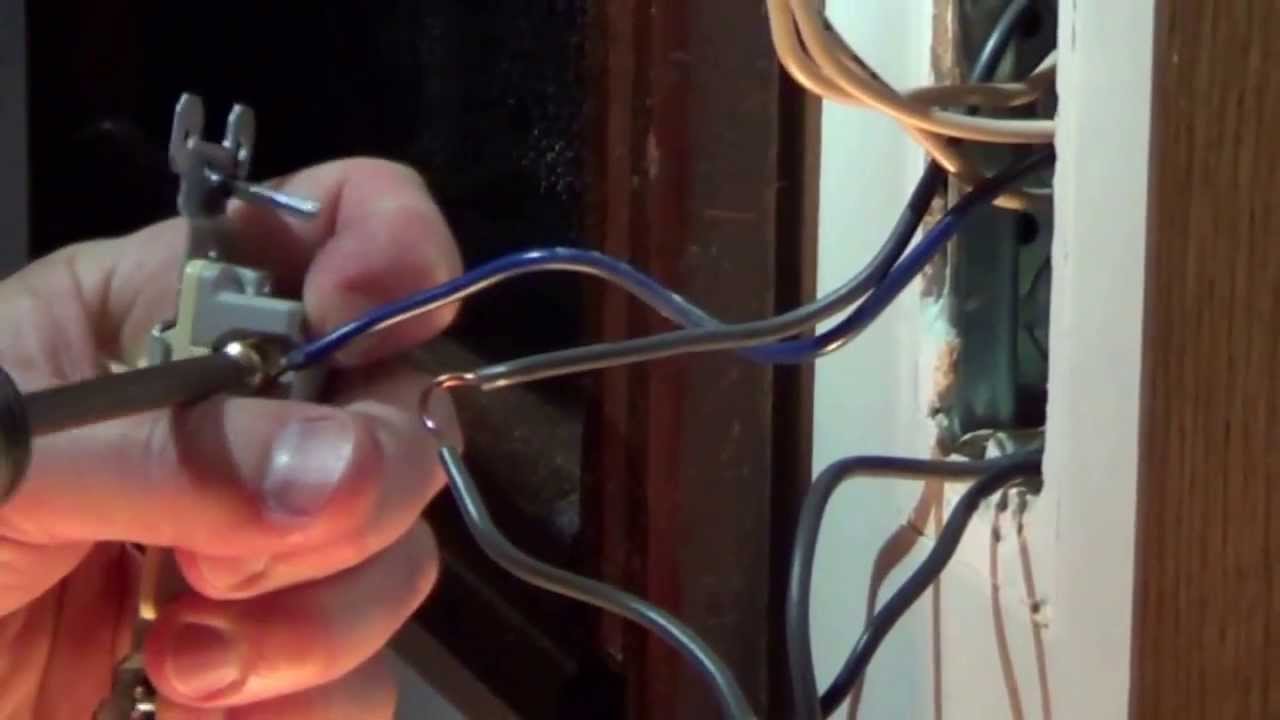
How To Wire A Single Pole Light Switch
How to Install Light Switch With 3 Wires
If you’re looking to install a light switch with three wires, there are a few things you need to keep in mind. First, make sure that the power is off before you begin working. Once you’ve confirmed that the power is off, start by removing the faceplate from the switch.
Next, loosen the screw that holds the green ground wire and remove it from the switch. With the ground wire removed, you can now remove the two black wires from the screws on either side of the switch.
Now that all of the wires have been removed from the switch, it’s time to start installing your new light switch.
Begin by attaching the green ground wire to one of the screws on your new switch. Once that’s secure, take each of the black wires and attach them to either side of your new switch – one on each screw. Make sure that these connections are tight and secure before moving on.
Once all three wires are properly attached to your new light switch, replace the faceplate and turn on power at circuit breaker or fuse box.. Test your new lightswitch by flipping it up and down to ensure proper function!
How to Install Light Switch With 2 Wires
If you’re installing a new light switch, you may need to first identify the number of wires in your electrical box. If there are only two wires, it’s likely that the switch controls a single light fixture. In this case, you can install the switch by following these simple steps:
1. Turn off the power to the circuit at your main electrical panel.
2. Remove the old switch from the electrical box and disconnect the wires.
3. Connect the black wire to one of the brass terminals on the new switch, and connect the white wire to the other brass terminal.
4. Securely fasten the new switch in place and turn on power to test it out!
How to Wire a Light Switch
Wiring a light switch is not as difficult as most people think. In fact, it is quite easy to do, provided you have the right tools and know-how. Here are some simple steps on how to wire a light switch:
1. First of all, you need to gather the necessary tools and materials. These include a screwdriver, wire strippers, electrical tape, and of course, the wires themselves.
2. Once you have all of these things together, start by removing the cover plate from the light switch using the screwdriver.
Be careful not to lose any of the screws!
3. With the cover plate removed, you should now see two brass screws holding the actual switch in place. Using your wire strippers, strip about ½ inch of insulation from each of the two wires that are connected to these screws.
4. Take one of these stripped wires and wrap it around one of the screws (it doesn’t matter which one). Tighten this screw until it is snug against the wire; make sure that there are no gaps between the wire and screw head. Now do the same thing with the other wire/screw combination.
5. The last step is to put everything back together again – replace the coverplate and turn on your power supply (be sure to test your work first with a voltmeter!). If everything looks good, then congratulations – you’ve just successfully wired a light switch!
Leviton 3-Way Switch As Single Pole
If you’re looking for a single-pole switch that can be used in a three-way circuit, the Leviton 3-Way Switch is a great option. This switch can be used to control a light fixture from two different locations, and it’s easy to install. Here’s what you need to know about the Leviton 3-Way Switch:
How It Works: The Leviton 3-Way Switch has two brass terminals and one green terminal. The brass terminals are connected to the load (or hot) wires, while the green terminal is connected to the ground wire. When you flip the switch, it breaks the connection between the load wires and completes the connection between the ground wire and one of the load wires.
This causes current to flow through the light bulb and turn it on.
Installation: Installing a Leviton 3-Way Switch is easy. Just remove your old switch and insert the new switch into the electrical box.
Make sure that all of the wires are securely fastened to their respective terminals, then screw in the faceplate and flip on your circuit breaker. Test your new switch by turning on your lights from both locations.
Advantages: The biggest advantage of using a Leviton 3-Way Switch is that it’s very versatile.
You can use it in any standard three-way circuit, and it’s easy to install yourself without having to call an electrician.
Credit: www.youtube.com
How Do You Wire a Single Pole Switch With 3 Wires?
There are a few different ways to wire a single pole switch with three wires. The most common way is to connect the two hot wires to the brass screws on either side of the switch and the ground wire to the green screw on the side of the switch. Another way is to connect one of the hot wires to the top brass screw, the other hot wire to the bottom brass screw, and then connect the ground wire to either of the black screws on either side ofthe switch.
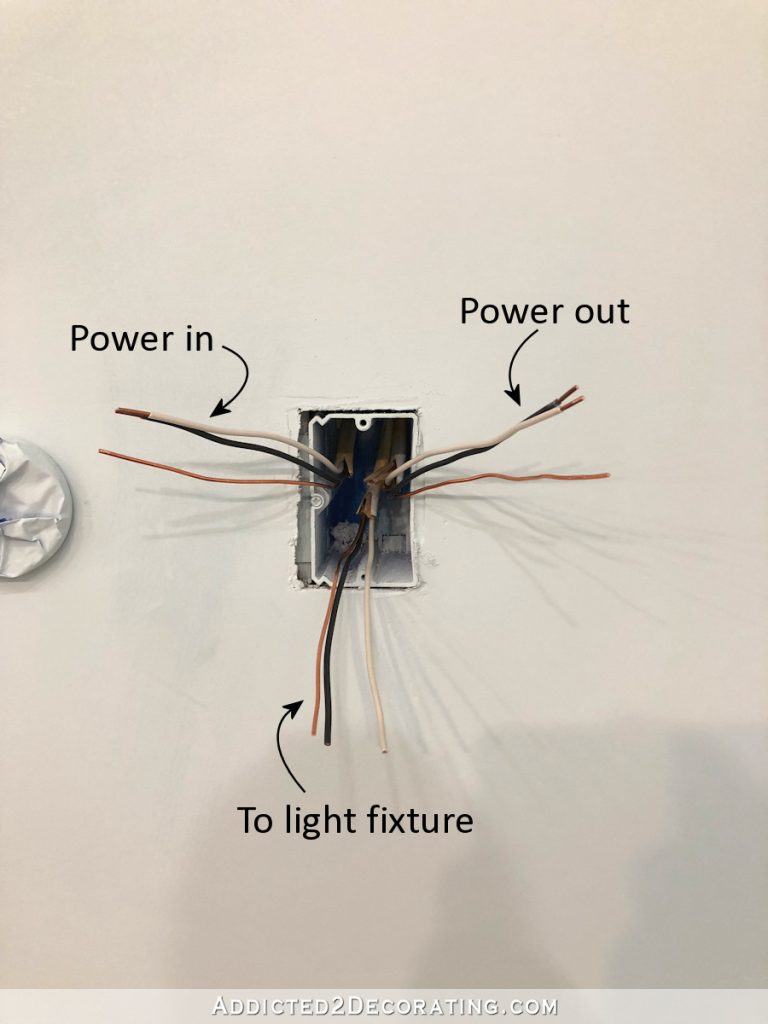
Why Does My Single Light Switch Have 3 Wires?
If you have ever looked at the back of a single light switch, you may have noticed that there are three wires attached to it. Most people are only familiar with two-wire light switches, so this can be confusing. The reason your single light switch has three wires is because it is capable of controlling two different circuits.
The three wires are known as the “common,” ” traveler” and “ground.”
The common wire is the one that goes to the light fixture itself. The traveler wires are the ones that go to the other side of the switch (the side that does not have power going to it).
And finally, the ground wire is connected to the metal plate on the back of the switch.
Most single light switches only have two wires because they are only controlling one circuit. However, if you have aswitch that controls two different circuits, then it will have three wires.
Does It Matter Which Wire Goes Where on a Single Pole Light Switch?
No, it does not matter which wire goes where on a single pole switch. The only time it matters is when you are wiring a three-way or four-way switch.
What is a 3-Way Single Pole Switch?
In electrical engineering, a three-way switch is a type of switch that is used to control a light or other electrical device from two different locations. A three-way switch is usually used in conjunction with a two-way switch, which allows the user to control the light or device from two different locations. Three-way switches are typically used to control lights or devices in large rooms or areas where there is more than one entrance.
Conclusion
If you need to install a single pole light switch with three wires, it’s easy to do. Just follow these simple steps and you’ll be able to do it in no time.
First, turn off the power to the circuit that you’ll be working on.
Then, remove the plate from the old switch and disconnect the wires. Next, connect the black wire from the new switch to the black wire from the circuit. Then, connect the red wire from the new switch to the blue or red wire from the circuit.
Finally, connect the green or bare copper wire from the new switch to the green or bare copper grounding wire from the circuit.
Once you’ve made all of your connections, just screw in your new switch and put your plate back on. Then turn on power to test your work – and that’s it!