How to Check Led Bulb Without Multimeter
If you’re wondering whether a particular LED bulb is still good, the easiest way to check is with a multimeter. First, make sure the multimeter is on the correct setting. Then, touch the probes to the appropriate terminals on the LED bulb.
If the light doesn’t come on, it’s probably due to a bad connection.
- Unscrew the LED bulb from its socket and hold it in your hand
- Look at the LED filament through the lens of the multimeter
- If the filament is not burned out, you will see a tiny red or orange light glowing inside the bulb
- If the filament is burned out, you will see a dark spot inside the bulb where the filament used to be
How Can You Tell If an Led Bulb is Blown?
If your LED bulb is flickering or dimming, it may be a sign that it is beginning to fail. You can also tell if an LED bulb is blown if it makes a popping sound when you turn it on or off. If the filament in an LED bulb is broken, the bulb will usually stop working entirely.
How Do You Test Led Light Bulbs?
If you’re looking to test an LED light bulb, there are a few things you’ll need to keep in mind. First, LED bulbs are designed to last much longer than traditional incandescent bulbs – up to 50,000 hours or more. This means that they’re not as likely to “burn out” or stop working as quickly as other types of bulbs.
However, it’s still possible for an LED bulb to malfunction, so it’s always a good idea to test your bulbs before using them.
To test an LED bulb, start by screwing it into a lamp or fixture. Once the bulb is secure, turn on the power and observe the light.
If the bulb is working properly, it should emit a steady, bright light. If the light is flickering or dimming, this could be a sign that the bulb is defective and should be replaced.
How Do You Check If an Led is Working?
There are a few different ways that you can check to see if an LED is working. The first way is to simply look at the LED and see if it is lit up. If the LED is not lit up, then it is probably not working.
Another way to check an LED is to use a multimeter to measure the voltage across the leads of the LED. If there is no voltage present, then the LED is not working.
How Do You Check Led Voltage?
When working with LEDs, it is important to know the voltage drop across the LED in order to calculate the current required for a given forward voltage. The easiest way to measure the voltage drop across an LED is to use a multimeter set to its diode testing mode. Once the multimeter is set up, simply touch the probes to the positive and negative leads of the LED.
The reading on the multimeter will be the voltage drop across the LED.

Credit: www.wikihow.com
How to Test Led Bulb With Battery
If you’re curious about whether or not a particular LED bulb will work with your battery, there’s an easy way to test it out! All you need is a 9-volt battery and a voltmeter. Here’s how to do it:
1. Connect the positive lead of the voltmeter to the positive terminal of the battery.
2. Connect the negative lead of the voltmeter to the contact point on the LED bulb.
3. If the LED bulb lights up, that means it’s compatible with your battery!
If not, then you’ll need to find a different LED bulb or try a different type of battery.
Testing an LED bulb in this way is quick and easy, and it can save you a lot of time and hassle in the long run. So next time you’re wondering if an LED bulb will work with your battery, be sure to give this method a try!
How to Check Led Bulb With Multimeter
Most people don’t know how to properly check their LED bulbs with a multimeter. Here’s a quick guide on how to do it:
First, make sure that your multimeter is set to the correct setting.
For checking an LED bulb, you’ll want to set it to the “diode” or “continuity” setting.
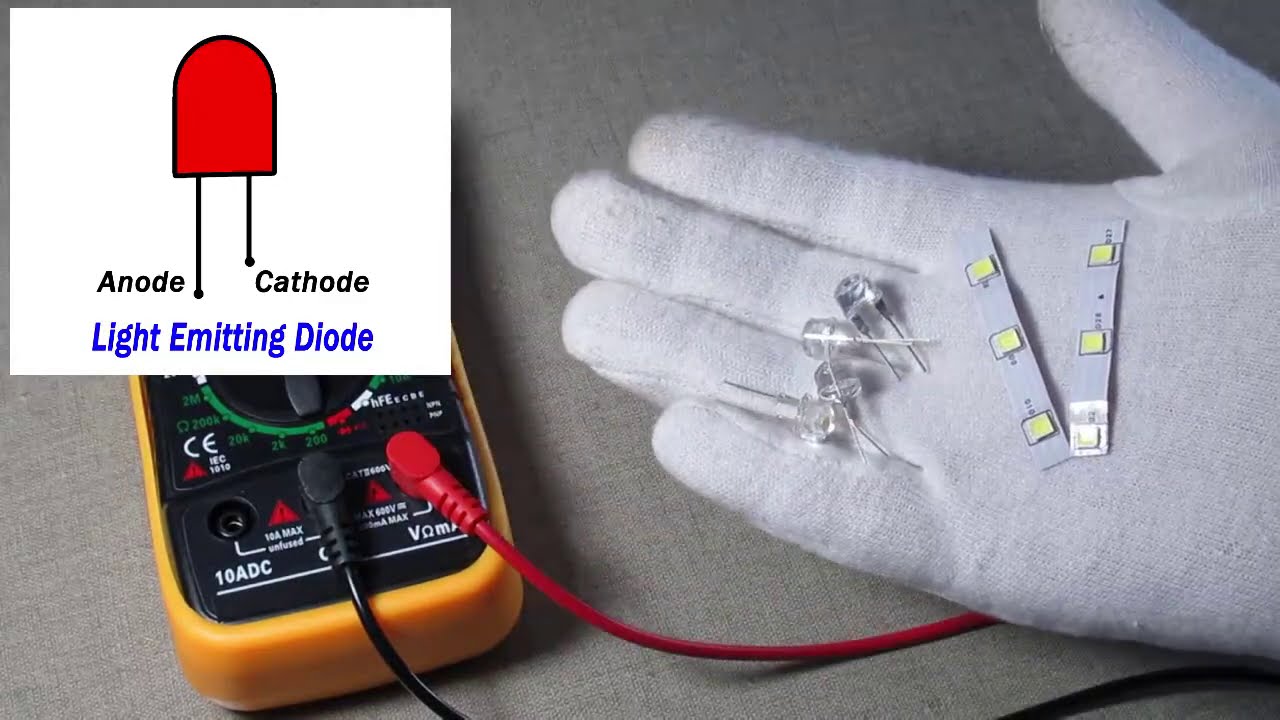
Next, touch one of the probes from your multimeter to the positive (anode) lead of the LED bulb, and touch the other probe to the negative (cathode) lead.
If the bulb is working properly, you should see a reading on your multimeter.
The exact reading will depend on the type of bulb you’re testing, but it should be in the range of 0.5-1.5 volts for most standard LEDs.
If you don’t see a reading on your multimeter, then there’s a good chance that the bulb is burned out and needs to be replaced.
How to Test 12V Led Lights
If you’re looking to test your 12V LED lights, there are a few things you’ll need to do. First, make sure that the LED light is properly connected to the power source. Next, use a multimeter to test the voltage of the power source.
Finally, turn on the power switch and use the multimeter to test the current flowing through the LED light.
How to Test Led Lights
If you’re looking to test your LED lights, there are a few things you’ll need to keep in mind. First, make sure that the power is off before testing any bulbs. Next, use a multimeter to test the voltage and current of the light.
Once you have this information, you can use it to determine whether or not your LED light is working properly.
How to Test Smd Led With Multimeter
If you want to test an SMD LED with a multimeter, there are a few things you need to know. First, SMD LEDs have three leads, so you’ll need to use the multimeter’s probes to make contact with two of the three leads. Second, because SMD LEDs are so small, it can be difficult to get a good connection with the probes; try using alligator clips or tweezers to help hold the probes in place.
Finally, when testing an SMD LED with a multimeter, you’ll want to set the multimeter to read DC Voltage; most SMD LEDs have a forward voltage of around 2 volts.
How to Test Led Headlight Bulb With Multimeter
LED headlights are becoming more and more popular in today’s vehicles. They are much brighter than traditional halogen bulbs and last much longer. Many people are unsure of how to test their LED headlight bulb with a multimeter though.
Here is a quick guide on how to do it.
First, you will need to turn off the power to your vehicle’s headlights. Next, locate the positive and negative terminals on the back of the LED headlight bulb.
Connect the positive terminal of the multimeter to the positive terminal on the LED bulb and connect the negative terminal of the multimeter to the negative terminal on the LED bulb.
Now, turn on your multimeter and set it to read DC voltage. You should see a reading somewhere between 9-14 volts.
If you do not see a reading or if it is outside of that range, then there is likely an issue with your headlight bulb and it will need to be replaced.
How to Check Smd Led Voltage
When working with surface-mount devices (SMDs), it is often necessary to check the voltage of an LED. This can be done using a multimeter, but there are some things to keep in mind. First, make sure that the multimeter is set to the correct setting.
Second, touch the probes to the appropriate pads on the LED. The positive probe should touch the anode pad, and the negative probe should touch the cathode pad. If everything is set up correctly, you should see a reading on the multimeter that indicates the voltage of the LED.
How to Test a Gu10 Led Bulb
If you’re looking to test a GU10 LED bulb, there are a few things you’ll need to do. First, make sure the power is off before testing the bulb. Next, use a multimeter set to ohms to test between the two pins on the bottom of the bulb.
If the reading is infinite, that means the bulb is good. However, if you get a reading of zero or close to zero, that means the bulb is bad and needs to be replaced.
Conclusion
In this blog post, the author explains how to check a LED bulb without using a multimeter. First, the author unscrews the LED bulb and removes the glass cover. Next, the author uses a small screwdriver to touch the positive lead of the LED (the longer lead) to the negative lead of the battery.
If the LED lights up, it is working. Finally, the author puts everything back together.