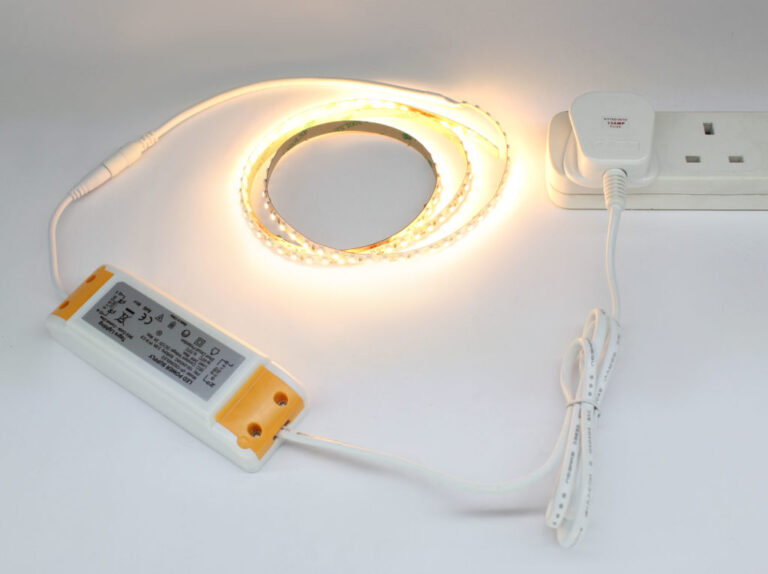
How to Test Led Driver With Multimeter
If you’re unsure whether or not your LED driver is working properly, you can test it with a multimeter. This guide will show you how to do that quickly and easily. First, make sure that your multimeter is set to the correct setting.
For testing an LED driver, you’ll need to use the AC voltage setting. Once your multimeter is set up, touch the leads to the positive and negative terminals of the LED driver. You should see a reading on the display. Check Led Drivers Basics
If the reading is within the normal range for an AC voltage, then your LED driver is likely working properly. However, if the reading is outside of that range, it’s possible that there’s an issue with your LED driver. If you suspect that there may be a problem, it’s best to consult with a professional to get their opinion before taking any further action.
How to Test Led Driver With Multimeter
- To test a led driver with a multimeter, first turn off the power to the led driver
- Next, disconnect the leads from the led driver
- Set your multimeter to the resistance setting and touch each of the leads to one of the terminals on the multimeter
- If the reading is infinite, then there is no continuity and the led driver is faulty
- If you get a reading other than infinity, then there is continuity and the led driver is working properly
How Do I Test an Led With a Multimeter?
There are a few different ways that you can test an LED with a multimeter. The first way is to simply test the voltage across the LED terminals. If the LED is working properly, you should see a voltage drop of around 2 volts.
If there is no voltage drop, or if the voltage drop is significantly less than 2 volts, then the LED is probably not working properly.
Another way to test an LED is to measure the current flowing through it. To do this, you need to put your multimeter in “current” mode and then place one of its leads on each of the LED terminals.
If there is current flowing through the LED, you should see a reading on your multimeter. The reading will tell you how much current is flowing through the LED (in milliamps). If there is no current flowing through the LED, or if the reading is very low, then again, the LED is probably not working properly.
Finally, you can also test an LED by measuring its resistance. To do this, simply put your multimeter in “resistance” mode and touch one lead to each of the LED terminals. You should see a low resistance reading if the LED is working properly (typically between 1 and 10 ohms).
A high resistance reading indicates that there may be something wrong with theLED.
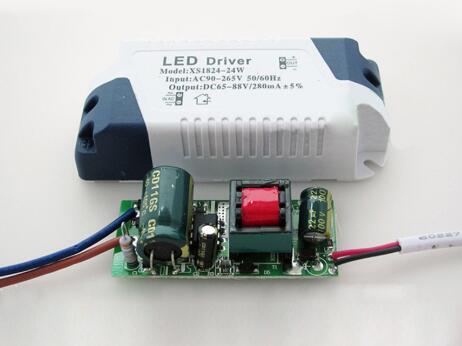
Why Do Led Drivers Fail?
One of the most common reasons for LED drivers to fail is due to poor thermal management. If an LED driver isn’t properly cooled, it can overheat and eventually fail. Another common reason for LED drivers to fail is due to voltage spikes or surges.
These can damage the delicate electronics inside the driver, causing it to malfunction or even fail completely. Finally, another reason why LED drivers may fail is simply due to wear and tear over time. Like any electronic device, they will eventually reach the end of their lifespan and need to be replaced.
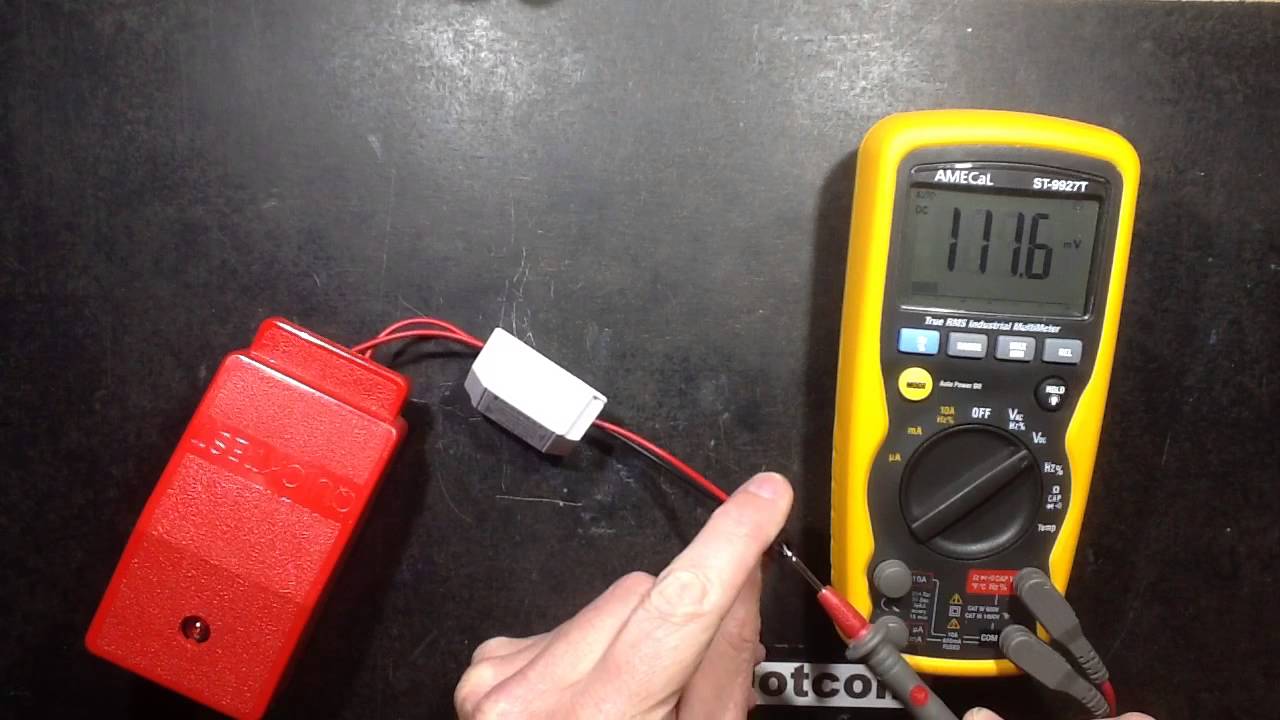
How Do You Measure Led Driver Current?
When it comes to measuring LED driver current, there are a few different methods that can be used. One common method is to use a multimeter. To do this, you’ll first need to set your multimeter to the “DC Amps” setting.
Once you’ve done that, you’ll need to touch the black lead of your multimeter to the “-” (negative) terminal of your LED driver, and then touch the red lead of your multimeter to the “+” (positive) terminal of your LED driver. This will allow you to get an accurate reading of the current flowing through your LED driver. Another method that can be used to measure LED driver current is by using an oscilloscope.
This method is a bit more complex, but it can provide more detailed information about the current flowing through your LED driver. To use an oscilloscope, you’ll need to connect the ground lead of your oscilloscope probe to the “-” (negative) terminal of your LED driver, and then connect the positive lead of your oscilloscope probe to the “+” (positive) terminal of your LED driver. Once you’ve done that, you should be able to see a waveform on your oscilloscope screen that represents the current flowing through your LED driver.
Whichever method you choose to use, it’s important that you take care when measuring LED driver current, as too much current can damage both your LEDs and yourLED drivers. How To Check If Led Driver Is Bad
How Many Volts Does a Led Driver Put Out?
A LED driver is a type of power supply that regulates the power to a LED or group of LEDs. A typical LED driver will put out around 3-12 volts. The amount of voltage depends on the type of LED and the desired brightness. Do All Led Lights Need A Driver?
How to Tell If Led Driver is Bad
If your LED light is flickering or not working properly, it could be a sign that the LED driver is bad. Here are a few ways to tell if your LED driver is bad:
1. Check the voltage.
The first thing you’ll want to do is check the voltage of your LED light. If it’s lower than what it’s supposed to be, then this could be a sign that the driver is bad.
2. Check for loose connections.
Another way to tell if the driver is bad is by checking for loose connections. If there are any loose wires or connections, this could be causing your LED light to flicker or not work properly.
3. Check the current.
You can also check the current of your LED light to see if it’s within normal range. If it’s higher than normal, this could be another indication that the driver is bad and needs to be replaced.
Led Driver Troubleshooting
If you’re having trouble with your LED driver, there are a few things you can do to troubleshoot the issue. First, check to make sure that the power supply is properly connected and that the correct voltage is being supplied. Next, check the LED driver itself for any loose connections or damaged components.
Finally, if all else fails, you can try replacing the LED driver with a new one.
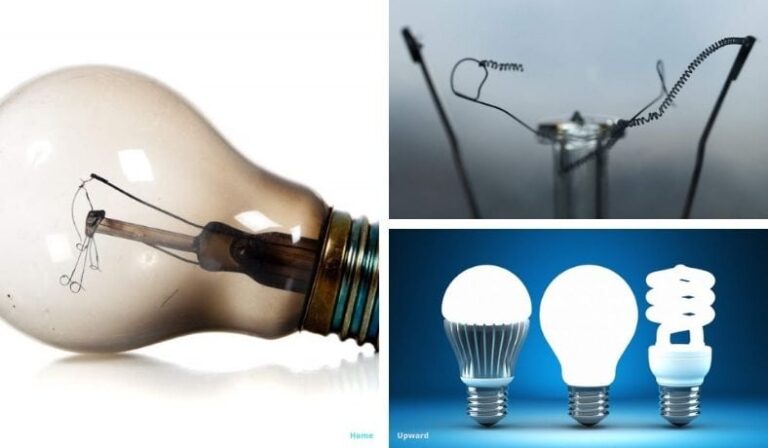
How to Check Led Bulb Without Multimeter
If you want to know if an LED bulb is working without a multimeter, there are a few things you can do. First, make sure the power is turned off to the circuit that the LED bulb is in. Next, remove the LED bulb from its socket and look at the two wires coming out of the base of the bulb.
One of these wires will be positive and one will be negative. To test the bulb, touch the positive wire to the negative wire. If the LED lights up, then it is working.
If it does not light up, then it is not working and needs to be replaced.
Led Driver Failures
Few things are as frustrating as a LED driver failure. Not only do they typically require a replacement, but they can also cause all sorts of other issues with your system. In this blog post, we’ll take a look at some of the most common causes of LED driver failures and what you can do to prevent them.
One of the most common causes of LED driver failures is overheating. When an LED driver overheats, it can damage the internal components and cause it to fail. This is often caused by poor ventilation around the driver or by using a lower quality or damaged driver.
To prevent this from happening, make sure that your drivers are properly ventilated and that you’re using high-quality drivers that are designed for your system.
Another common cause of LED driver failures is voltage spikes. These spikes can occur when there’s a sudden change in power demand on your system, such as when someone turns on a large appliance or equipment.
These spikes can damage the circuitry within the LED driver and cause it to fail. To protect against voltage spikes, make sure that your circuit breakers are up to date and that you have surge protection installed on your system.
Finally, another common issue that can cause LED drivers to fail is water damage.
This can happen if water gets into thedriver through cracks or holes in its casing. Once water gets inside, it can short out the circuitry and cause the driver to fail. To prevent this from happening, make sure that your drivers are properly sealed and waterproofed.
If you live in an area prone to flooding, consider installing flood lights instead of traditional ones so that you don’t have to worry about water damage to your drivers .
Led Driver Calculator
Are you looking for a LED driver calculator? There are many different types of LED drivers on the market, so it can be difficult to know which one is right for your project. This calculator will help you determine the size and type of LED driver that you need.
First, you’ll need to know the voltage and current requirements of your LEDs. You can find this information in the datasheet for your LEDs. Once you have that information, just plug it into the calculator and it will tell you what size driver you need.
There are two main types of LED drivers: constant current and constant voltage. Constant current drivers maintain a consistent current flowing through your LEDs, even as the voltage changes. This is important because it ensures that your LEDs will always produce consistent light output.
Constant voltage drivers, on the other hand, maintain a constant voltage across your LEDs regardless of the current draw. These are typically used with high-power LEDs that require more current than a constant current driver can provide.
Once you’ve determined the type of driver you need, select a few different models from different manufacturers to compare prices and features.
Make sure to read reviews before making your final decision. With a little bit of research, you should be able to find an LED driver that’s perfect for your project!
Led Driver Tester
If you are in the market for a new led driver tester, you may be wondering what options are available and which one is right for you. Here is a rundown of some of the most popular led driver testers on the market to help you make an informed decision.
The first option is the LED Tester from Pro Lighting.
This unit is simple to use and provides accurate results. It has a large easy-to-read display and an auto shut off feature to conserve battery life. The LED Tester is also backed by a one year warranty.
The second option is the LED Driver Tester from Light Emitting Solutions. This unit is more expensive than the Pro Lighting model but it offers more features such as different test modes, selectable voltage ranges, and storage of up to 99 readings. The Light Emitting Solutions LED Driver Tester also comes with a carrying case and has a three year warranty.
The third option is the APD Semiconductor LED Driver Tester. This unit is similar in price to the Light Emitting Solutions model but does not offer as many features. It does have a backlit display though, which makes it easier to use in low light conditions.
The APD Semiconductor LED Driver Tester also has a one year warranty.
Finally, there is the LUX Meter from Dranetz Technologies. This unit is more expensive than all of the other options but it offers several unique features such as Bluetooth connectivity, software updates, and remote monitoring capabilities.
Led Driver Failure Rate
As the semiconductor industry continually strives to miniaturize electronic components and increase their reliability, the LED driver has not been immune to these trends. In fact, recent years have seen a dramatic decrease in the LED driver failure rate, thanks to advances in design and manufacturing techniques.
However, despite these improvements, LED drivers can still fail prematurely due to a number of reasons.
The most common cause of failure is overheating, which can occur if the driver is inadequately cooled or if it is used in an environment that is too hot. Other causes of failure include electrical overstress (EOS), electrostatic discharge (ESD), and mechanical stress.
If an LED driver does fail, it is important to identify the cause so that steps can be taken to prevent future failures.
For example, if overheating is the cause of failure, then improving cooling or using the driver in a cooler environment may be necessary. If ESD or EOS are determined to be the cause, then redesigning the circuit board layout or using different materials may be required. Finally, if mechanical stress is determined to be the root cause of failure, then changing the mounting method or using different materials may solve the problem.
No matter what the cause of failure may be, it is important to take action to prevent future failures. By understanding why an LED driver fails and taking steps to correct the problem, manufacturers can greatly improve their product’s reliability.
Replacement Led Drivers
If you are looking to replace your old LED drivers, there are a few things you need to know. First, what is an LED driver? An LED driver is an electrical device that regulates the power supply to an LED or group of LEDs.
A typical LED driver converts AC mains voltage into a lower DC voltage and controls the current passing through the LED.
There are two main types of LED drivers: constant current and constant voltage. Constant current drivers maintain a steady output current regardless of input voltage, while constant voltage drivers maintain a steady output voltage regardless of input current.
Most LEDs require a constant current driver, as they are very sensitive to changes in current.
When choosing a replacement LED driver, it is important to select one that is compatible with your existing LEDs. Make sure to check the forward Voltage (Vf) and maximum Current (Imax) ratings of both the driver and the LEDs.
The Vf rating should be within 10% of the operating voltage of the LEDs, and the Imax rating should be greater than or equal to the maximum current draw of the LEDs. For example, if your LEDs have a Vf rating of 3V and an Imax rating of 30mA, you would need an LED driver with a Vf rating between 2.7V and 3.3V and an Imax rating greater than 30mA.
It is also important to consider power dissipation when selecting an LED driver.
Power dissipation refers to how much heat is generated by the device when it is running at full capacity. If too much heat is generated, it can damage both thedriver and the LEDs themselves.
Conclusion
If you want to test your LED driver with a multimeter, there are a few things you need to keep in mind. First, make sure that the multimeter is set to the correct setting. Second, connect the positive lead of the multimeter to the positive terminal of the LED driver, and connect the negative lead of the multimeter to the negative terminal of the LED driver.
Finally, take a reading on the multimeter and compare it to the expected value. If everything checks out, then your LED driver is working properly!