How to Tell If Led Driver is Bad
You may be wondering how to tell if your LED driver is bad. There are a few things that you can look for that may indicate that your LED driver is failing. If your LEDs are flickering, dimming, or going out prematurely, this could be a sign that your LED driver is failing.
You may also notice that your power bill is increasing, even though you’re not using more electricity than usual. If you suspect that your LED driver is bad, it’s important to have it checked out by a professional as soon as possible.
- There are a few steps you can take to determine if your LED driver is bad: 1
- Check the power supply
- If the power supply is not providing enough power, the LED driver will not be able to function properly
- Check for any loose connections
- If there are any loose wires or connections, this could be causing the LED driver to malfunction
- Test the LED driver with a multimeter
- This will help you determine if there is an issue with the circuitry of the LED driver itself
How Do I Know If My Led Driver is Bad?
It’s not uncommon for LED drivers to fail, but there are a few things you can check to see if yours is bad. First, check the input voltage and make sure it’s within the correct range for your driver. Next, check the output current and voltage.
If they’re outside of the normal range, that could indicate a problem. Finally, take a look at the waveform of the output signal. If it’s distorted or has spikes, that could be a sign that the driver is failing.
What Causes an Led Driver to Fail?
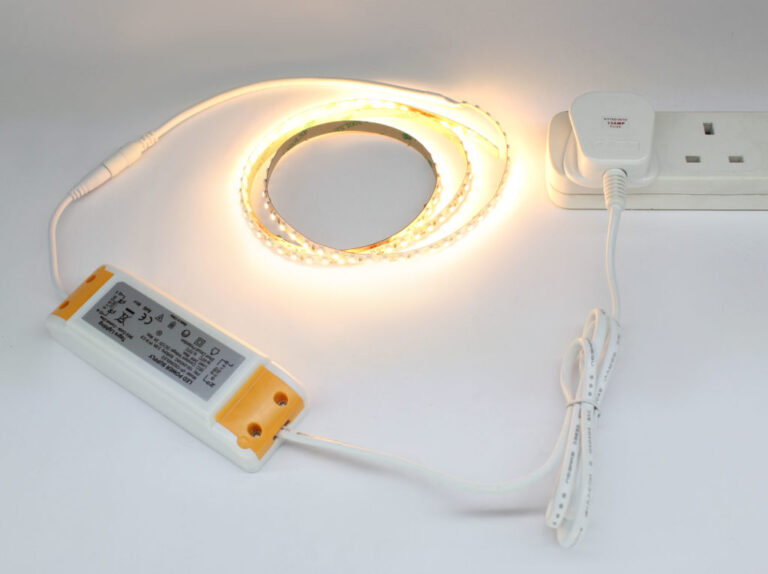
An LED driver is an electronic device that regulates the power supplied to an LED or array of LEDs. A constant current LED driver is usually used to prevent damage to the LEDs from electrical surges, and to maintain a consistent light output. When an LED driver fails, it can be due to a number of factors, including:
– Overheating: This is one of the most common reasons for LED drivers to fail. If an LED driver overheats, it can cause the internal components to become damaged or even melt. Overheating can be caused by a number of factors, including incorrect wiring, excessive ambient temperature, or blocked ventilation.
– Poor quality components: Another common cause of LED driver failure is using poor quality components. This includes using substandard capacitors, resistors, or transistors. Using inferior components can lead to early failure of the LED driver.
– Vibration: Another factor that can cause an LED driver to fail is vibration. If the device is subject to excessive vibration (such as being mounted on a vibrating surface), this can lead to component damage and eventually failure.
– Age: Like any other electronic device, over time an LED driver will slowly degrade and become more likely to fail.
How Long Do Led Drivers Last?
LED drivers are designed to last for a very long time. In fact, many manufacturers offer warranties of up to 10 years on their products. However, the actual lifespan of an LED driver will depend on a number of factors, including the quality of the product, the operating conditions and the environment in which it is used.
Can a Led Driver Go Bad?
Yes, a LED driver can go bad. There are several ways this can happen:
1) The most common way is simply through wear and tear.
Over time, the circuitry in the driver can become damaged or degraded, causing it to no longer work properly. This is especially true if the driver is not protected against power surges or other electrical problems.
2) Another way a LED driver can go bad is if it overheats.
This can happen if the driver is used in an environment that is too hot, or if it isn’t properly ventilated. If the driver overheats, it can damage the circuitry and cause it to fail.
3) Finally, a LED driver can also go bad if it is subject to excessive vibration.
This can occur if thedriver is installed in an area where there is a lot of movement or shaking (such as near construction equipment). The vibration can damage the delicate circuitry inside the driver, causing it to malfunction.

Credit: www.amazon.com
Led Driver Troubleshooting
If you’re having trouble with your LED driver, there are a few things you can do to troubleshoot the issue. First, check the power supply to make sure it is working properly. Next, check the connections to make sure they are tight and free of any debris.
Finally, check the drivers themselves for any damage or corrosion. If you can’t find the source of the problem, it may be necessary to replace the LED driver.
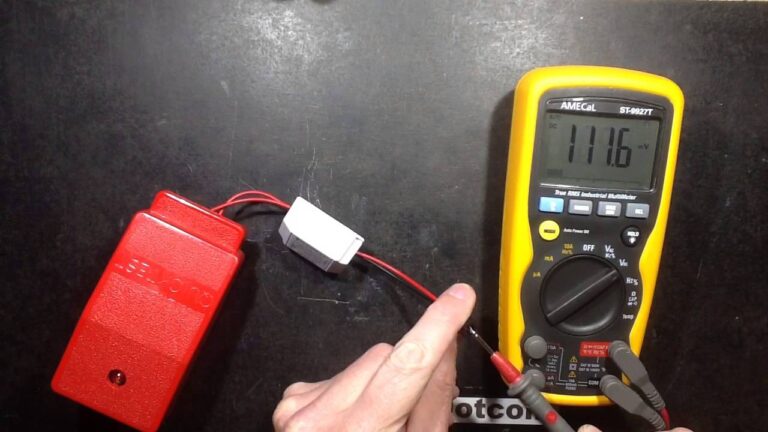
How to Test Led Driver With Multimeter
When testing a LED driver with a multimeter, it is important to first identify the positive and negative terminals of the device. The positive terminal will typically be marked with a “+” sign, while the negative terminal will be marked with a “-” sign. Once the proper terminals have been identified, simply connect the multimeter’s probes to these terminals and take a reading.
If the reading is within the acceptable range for your particular device, then the LED driver is functioning properly.
Led Driver Tester
As an LED driver tester, you are responsible for testing the LED drivers to ensure that they meet the required specifications. You will need to have a strong understanding of electronics and be able to use test equipment such as oscilloscopes and multimeters.
The first step in testing an LED driver is to check the input voltage and current.
The driver should be able to operate within the specified range of voltages and currents. Next, you will need to check the output voltage and current. The output voltage should be within the specified range, and the output current should be within the specified range for the particular type of LED being used.
Once you have verified that the input and output voltages and currents are within specification, you will need to test the efficiency of the driver. This can be done by measuring the input power and comparing it to the output power. The efficiency should be at least 80%.
Finally, you will need to verify that the over-voltage protection (OVP) is working properly. The OVP should trip when the input voltage exceeds a certain level, typically around 5V. Once it trips, it should remain off until manually reset.
Led Driver Flashing Problem
If you’re having problems with your LED driver flashing, there are a few things you can check. First, make sure that the power supply is properly connected and that the correct voltage is being supplied. Next, check the connections to the LEDs themselves.
Make sure that they are secure and free of any debris or dirt. Finally, check the drivers themselves for any loose connections or damaged components. If all of these things check out, then it’s likely that the problem lies with the controller board.
Try replacing it with a new one to see if that solves the issue.
Led Driver Calculator
When it comes to LED drivers, there are a lot of different factors that need to be taken into account in order to ensure that your LEDs are properly powered. That’s where a LED driver calculator comes in handy!
A LED driver calculator will take into account the various factors involved in powering an LED, such as the forward voltage and current of the diode, the power supply voltage, and more.
This information is then used to determine the best way to wire up your LEDs for optimal power delivery.
There are a few different things that you’ll need to know before using a LED driver calculator. First, you’ll need to know the forward voltage and current of your diode.
This information can usually be found on the datasheet for the diode. Next, you’ll need to know the power supply voltage that you’re working with. And finally, you’ll need to know how many LEDs you’re looking to power.
With all of this information entered into the calculator, it will spit out a few different options for wiring up your LEDs. It’s important to note that not all calculators are created equal – some may only provide a single option, while others may provide multiple options depending on your specific needs. Be sure to read through all of the available options before making your final decision on how to wire up your LEDs!
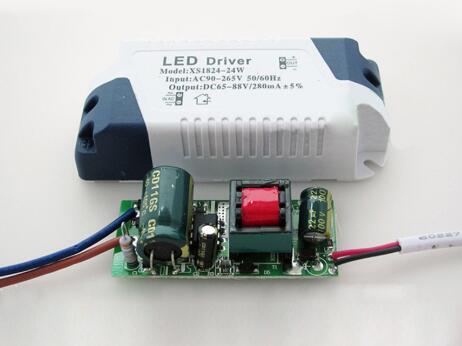
Led Driver Replacement
If your LED light fixture is no longer working properly, it may be time to replace the driver. Drivers are an essential component of any LED lighting system, and they can often be the first to fail. Luckily, replacing a failed driver is usually a simple process.
In most cases, you’ll just need to remove the old driver and install a new one in its place.
Before you begin, make sure that you have the proper replacement driver for your fixture. You’ll also need a few basic tools, including a screwdriver and wire cutter/stripper.
Once you have everything you need, follow these steps:
1) Turn off power to the fixture at the breaker box. This is an important safety precaution!
2) Remove the housing or lens from the fixture so that you can access the driver compartment.
3) Disconnect all wires from the old driver. Use your wire cutter/stripper to remove any insulation from the ends of the wires before proceeding.
4) Carefully remove the old driver from its mounting location inside the fixture. Take note of how it was installed so that you can replicate this when installing the new driver. Some drivers may be mounted with screws while others may snap into place – just be careful not to damage anything as you remove it.5) Install the new driver in its place, making sure to secure it properly according to manufacturer instructions.
. 6) Reconnect all wires to their appropriate terminals on the newdriver7))Testthefixturebeforereplacingthehousingorlens8))Restorepowertothefixtureatthebreakerbox
Congratulations!
Led Driver Failure Rate
The average LED driver failure rate is about 5%. This means that out of 100 LED drivers, approximately five will fail. The most common causes of LED driver failures are thermal runaway and overcurrent conditions.
Thermal runaway occurs when the temperature of the LED driver exceeds its maximum operating temperature, typically 150°C. This can happen if the LED driver is placed in a high-temperature environment or if it is operated at higher-than-recommended currents. Overcurrent conditions occur when the current flowing through the LED driver exceeds its rated value.
This can happen if the LED load is too great or if there is a short circuit in the system.
Gmima Led Driver
When it comes to choosing the right LED driver for your needs, there are many factors to consider. One of the most important is the GMIMA. This is an acronym that stands for “Gross Mechanical Index of Mechanical Abuse” and it’s a rating system that determines how durable an LED driver is.
The higher the GMIMA rating, the more resistant the driver is to mechanical shock and vibration.
If you’re looking for a durable LED driver that can withstand rough conditions, then you should look for one with a high GMIMA rating. Drivers with a lower rating may be cheaper, but they won’t last as long and they could break down sooner.
Conclusion
If your LED driver is no longer working properly, there are a few ways you can tell. First, check to see if the driver is receiving power. If it is, then check the output voltage of the driver.
If the output voltage is lower than it should be, then the driver is most likely bad. Finally, check for any visible damage to the driver itself. If you see any cracks or breaks in the casing, then the driver is probably not going to work correctly.