How to Install Led Strip Lights on Wall
Installing LED strip lights is a simple and easy way to brighten up any room in your home. There are a few things to keep in mind when installing them, though, so that you get the best results.
- Firstly, remove any existing light fixtures from the wall
- If there are no light fixtures present, skip to step 3
- Next, using a drill or screwdriver, create pilot holes in the wall where you want your led strip lights to be installed
- Make sure that the holes are big enough for the screws that will be used to secure the strips in place
- Once the pilot holes have been created, begin feeding your led strip lights through them until they are all in place on the wall
- Leave a little bit of slack at either end so that you can easily connect them to a power source later on
- Now it’s time to secure the strips in place by screwing them into the pilot holes using small screws (such as drywall screws)
- Be careful not to overtighten these as you could damage the strips themselves
- Just snug them up against the wall so they don’t move around too much
- The final step is to connect your led strip lights to a power source (such as an outlet or Light switch) and turn them on!
How Do You Stick Led Strip Lights to the Wall?
If you want to add some extra light and style to your home, LED strip lights are a great option. But how do you stick them to the wall? Here are a few options:
1. Use double-sided tape. This is probably the easiest way to attach LED strip lights to the wall. Just peel off the backing and stick the lights in place.
Make sure the surface is clean and dry before applying the tape.
2. Use adhesive clips or mounts. These come in different sizes and shapes, so you can choose what works best for your space.
Adhesive strips are applied to the back of the light strip and then mounted onto the wall using screws or nails (depending on the type of clip).
3. Use magnets. If you don’t want to put any holes in your walls, magnets are a good option for attaching LED strip lights.
You’ll need to buy a special magnetic tape or adhesive that’s designed for use with LEDs. Apply this to the back of your light strip and then stick it onto any metal surface (like a filing cabinet).
Do Led Strip Lights Plug into the Wall?
Yes, LED strip lights can plug into the wall. Most LED strip lights have an adapter that plugs into a standard outlet. There are also battery-operated LED strip lights available.
How Do You Attach Led Strip Lights to Drywall?
If you’re looking to add some extra light to your space, LED strip lights are a great option. But if you’re wondering how to attach them to drywall, here’s a quick and easy guide.
First, you’ll need to measure the area where you want to install the LED strip lights.
Then, use a pencil or marker to mark the spot on the wall where you’ll be attaching the strips. Next, apply a generous amount of clear adhesive glue or double-sided tape to the back of the LED strips. Be sure to evenly distribute the adhesive so that the strips will stick properly.
Now it’s time to attach the strips to the wall. Starting at one end, slowly and carefully peel off the backing paper and press the LED strip onto the marked spot on the wall. Continue until all of the strips are in place.
Once they’re all attached, plug in your power supply and enjoy your new light!
What is the Best Way to Install Led Strip Lights?
If you’re looking to add some extra lighting to your home, LED strip lights are a great option. They’re relatively inexpensive, easy to install, and can be used in a variety of ways. In this blog post, we’ll show you the best way to install LED strip lights so that you can get the most out of them.
The first step is to determine where you want to place the lights. It’s important to choose an area that is well-lit so that the LEDs will be visible. Once you’ve found the perfect spot, clean the surface with a damp cloth to remove any dust or debris.
Next, measure the area where you’ll be placing the lights. This will help you determine how much tape or adhesive you’ll need. Once you have all of your materials ready, it’s time to start installing the lights.
If you’re using tape, simply peel off the backing and press the light strip into place. For adhesives, apply a small amount onto the back of the light strip and then press it into place. Make sure that each light is securely attached before moving on to the next one.
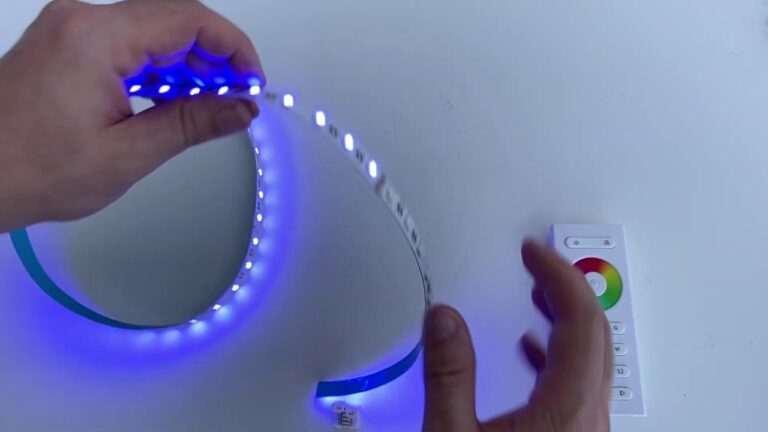
Once all of your LED strip lights are installed, plug them into an outlet and turn them on! You can use a remote control to change their settings such as brightness and color temperature. Experiment with different looks until you find one that suits your space perfectly.

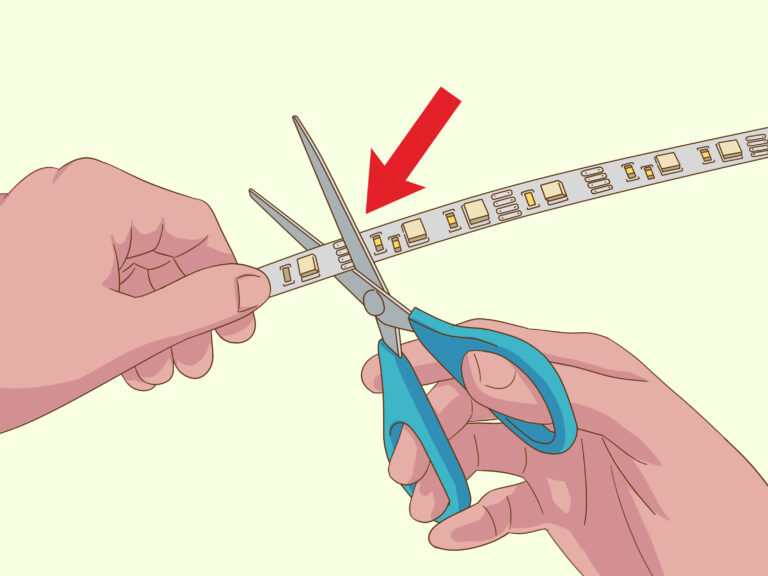
Credit: www.wikihow.com
How to Stick Led Strip Lights on Wall Without Damaging Paint
It can be tricky to stick LED strip lights on a wall without damaging the paint, but it is possible! Here are a few tips:
-Use painters tape or another type of removable adhesive to attach the LED strips to the wall.
This will minimize damage to the paint and make it easier to remove the lights when you’re ready.
-Make sure the surface you’re attaching the lights to is clean and dry before applying any adhesive. This will help ensure a strong bond.
-If you’re using battery-operated LED strips, be careful not to over-tighten the screws when attaching them to the wall. This could strip the paint off of the wall.
How to Install Led Strip Lights on Ceiling Tiktok
Are you looking for a fun and unique way to add some extra lighting to your home? Well, look no further than LED strip lights! These days, LED strip lights are all the rage on TikTok.
Not only are they super easy to install, but they also provide a cool and modern look to any space. In this blog post, we’re going to show you how to install LED strip lights on your ceiling in just a few simple steps.
First things first, you’ll need to purchase an LED light strip that is long enough to reach around the perimeter of your ceiling.
We recommend opting for a strip that is at least 16 feet long. Once you have your light strip, go ahead and unplug it from the power source. Next, use a ladder or step stool to help you reach the center of your ceiling.
With someone else’s help, hold one end of the light strip up against the ceiling while the other person uses double-sided tape or adhesive mounting strips to secure it in place.
Now it’s time to plug in your lightstrip and enjoy your new illuminated space!
How to Install Led Strip Lights around Corners
Are you looking to add some accent lighting to your home and don’t know where to start? Look no further than LED strip lights! These versatile lights can be used in a variety of ways, including under cabinets, inside cabinets, behind beds, on bookshelves—the possibilities are endless.
And best of all, they’re relatively easy to install. In this blog post, we’ll show you how to install LED strip lights around corners.
Installing LED strip lights around corners is a bit different than installing them in other areas.
The main thing you’ll need to keep in mind is that the adhesive on the back of the strips won’t adhere as well to curved surfaces. This means that you’ll need to use something called mechanical fasteners (more on that later) to secure the strip in place while the adhesive sets.
Here’s what you’ll need for this project:
-LED Strip Lights
-Power Supply
-Connector Cables (if needed)
-Mechanical Fasteners (zip ties or 3M Command Strips work well)
-Scissors or a Knife
The first step is to measure the area where you’ll be installing the LED strips.
If you’re using multiple strips, make sure to leave enough space between each one so that they don’t touch when installed. Once you have your measurement, cut your strip(s) of LEDs to size using scissors or a knife. Be careful not to damage any of the LEDs while cutting!
Next, it’s time to connect your power supply and any connector cables (if needed). Make sure that everything is properly connected before moving on.
Now it’s time for installation! Start by peeling off a small section of the adhesive backing on your LED strip and attaching it at one end of your measured area. Then slowly peel off more of the backing as you wrap the strip around the corner until you reach the other end. To secure the strip in place while the adhesive dries, use mechanical fasteners like zip ties or 3M Command Strips placed every few inches along the length of the strip.
Finally, plug in your power supply and turn on your new LED accent lighting!
How to Put Up Led Strip Lights
Installing LED strip lights is a quick and easy way to add accent lighting to any room. Although the process is simple, there are a few things you need to know before getting started. In this blog post, we’ll walk you through everything you need to know about putting up LED strip lights, including what supplies you’ll need and how to install them.
LED strip lights are a versatile and energy-efficient lighting option that can be used in a variety of settings. They’re perfect for accent lighting, task lighting, and even general illumination in some cases. And because they’re so easy to install, they’re a great do-it-yourself project for anyone who’s looking to add some extra light without breaking the bank.
The first thing you’ll need when installing LED strip lights is a power supply. You can either use an AC adapter or batteries, depending on where your strip lights will be located. If you’re using batteries, make sure they are fully charged before starting the installation process.
Next, choose a location for your LED strip lights. It’s important to find a spot where the strips will be adequately supported so they don’t sag or fall over time. Once you’ve chosen a location, clean the surface with alcohol wipes to remove any dirt or debris that could interfere with the adhesive backing on the strips.
Now it’s time to apply the strips themselves! Starting at one end of your chosen location, peel back the adhesive backing and stick the strip down firmly. Continue applying strips until you’ve reached your desired coverage area.
Finally, connect your power supply and turn on your new LED accent lighting!
Do Led Strip Lights Need to Be Plugged in
If you’re considering adding LED strip lights to your home, you might be wondering if they need to be plugged in. The answer is yes – LED strip lights do need to be plugged in. However, the good news is that they are very easy to install and don’t require any special wiring.
Here’s a quick overview of how to install LED strip lights:
1. Start by measuring the area where you want to install the lights. Then, cut the strip light to size using a sharp knife or scissors.
2. Next, peel off the backing on the adhesive tape and stick the light strips in place. Make sure that the strips are firmly attached so that they don’t come loose over time.
3. Once the strips are in place, plug them into an outlet using an extension cord or power adapter.
Be sure to use a UL-listed product for safety reasons.
4. That’s it!
How to Connect Led Strip Lights to Power Supply
If you’re looking to add some extra light and visual interest to your space, LED strip lights are a great option. But before you can enjoy their glow, you’ll need to connect them to a power supply. Here’s a step-by-step guide to help you get started.
1. Begin by measuring the length of your LED strip light. This will determine how much wire you’ll need to connect the strip to the power supply.
2. Cut two pieces of wire that are long enough to reach from the power supply location to the end of your LED strip light.
3. Strip about ½ inch of insulation off each end of both wires using wire strippers.
4. On one end of each wire, twist together the exposed copper strands around one of the terminals on your power supply (either positive or negative). Make sure these connections are tight so that they don’t come loose over time.
5. On the other end of each wire, twist together the exposed copper strands around the corresponding terminals on your LED strip light (again, either positive or negative). Again, make sure these connections are secure for best results.
How to Install Led Lights
If you’re looking to add some new lighting to your home or office, LED lights are a great option. They’re energy-efficient and long-lasting, and they can be used in a variety of ways to create different looks. Here’s a step-by-step guide on how to install LED lights.
1. Choose your location. Led lights can be used indoors and outdoors, so decide where you want to put them before you get started.
2. Prep the area.
If you’re installing led lights indoors, make sure the area is clean and free of dust before you begin. If you’re installing them outdoors, clear away any debris that might be in the way.
3. Install the base plate.
This is what the actual light will be attached to. Use screws or adhesive strips to attach it securely to the chosen surface.
4 .
Connect the wires . Most LED lights come with two wires – one positive (red) and one negative (black). Connect these to their corresponding terminals on the base plate .
Make sure the connection is tight so that there’s no risk of electrical shorts .
5 . Attach the light unit .
Once the wires are connected , simply snap or screw the light unit into place on top of the base plate . That’s it! You’ve successfully installed LED lights !
Rgb Lights for Room
Looking to add some fun and flair to your room? RGB lights are a great way to do just that! These versatile lights can be used to create all sorts of different looks, from a subtle ambiance to a party atmosphere.
And the best part is, they’re relatively inexpensive and easy to install.
RGB lights are available in a variety of shapes and sizes. You can find them in strips, as well as individual bulbs.
They also come in different colors, so you can choose the perfect look for your room.
To get started with RGB lighting, you’ll need a few things: an RGB controller, RGB lights, and power supplies. The controller will allow you to change the colors and patterns of the lights.
You can find controllers that work with your smartphone or tablet, as well as standalone units.
Once you have your controller and lights set up, it’s time to start having fun! Experiment with different color combinations and patterns to see what looks best in your space.
You can use RGB lights to accentuate certain features in your room or go for an all-out light show!
Conclusion
Installing LED strip lights on your wall is a great way to add some extra light to your room. Here are a few tips on how to do it:
1. Choose the right location for your strip lights.
You’ll want to place them where they’ll get plenty of light without being in the way.
2. Clean the wall where you’ll be installing the lights. This will help ensure that the adhesive strips stick properly.
3. Measure and cut the strips to fit your space. Make sure to leave enough excess at each end so you can connect them to the power source.
4. Use adhesive strips or mounting brackets to attach the LED strips to the wall.
Be careful not to damage the wires while doing this.
5 . Connect the positive and negative wires from the LED strips to your power source (a batteries or transformer).
Make sure all connections are tight so there’s no risk of electrical shock.
With these simple tips, you can easily install LED strip lights on your wall for added illumination in any room!